Creating and Setting Up Your First Mod
This tutorial will demonstrate how to create your first mod, and also discusses important information about modded game assets.
Once you have downloaded and opened the Dev Kit, the first thing you will need to do is create your first mod.
Step 1: Create .uplugin File
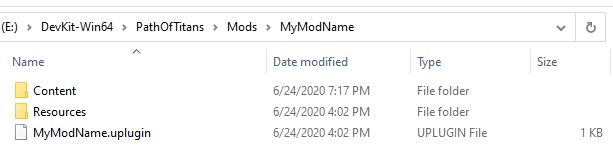
- Inside the
PathOfTitansfolder found within your dev kit, create a new folder calledMods. - Inside the Mod folder, create a second folder named after whatever your mod will be named. For example
ForestIsland - Right click inside this folder you just created and select
New > Text Document - Name this document the same name as your mod folder. For example
ForestIsland.txt - Open the text file you just created and copy + paste the text below into it. Replace
YourModNameHerewith the name of your mod. For example"FriendlyName" : "ForestIsland",
{
	"FileVersion" : 3,

	"FriendlyName" : "YourModNameHere",
	"Version" : 1,
	"VersionName" : "1.0",
	"CreatedBy" : "",
	"CreatedByURL" : "",
	"Description" : "",
	"Category" : "User Mod",
	"EnabledByDefault" : true,

	"Modules" :
	[
	],

	"CanContainContent" : true
}- Save your .txt file.
- Change the extension of your file from
.txtto.uplugin. You can do this by renaming it.
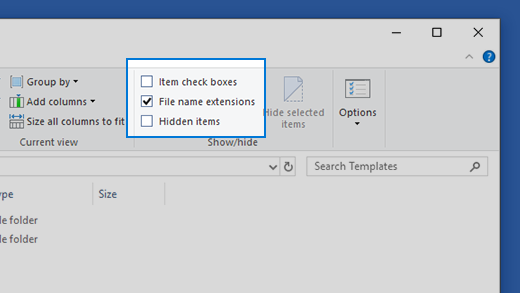
TIP
Ensure you can see file extensions by enabling "Show File Extensions" in Windows Explorer.
- Close and restart your Dev Kit.
DANGER
Important Notes About Naming Your Mod
Your mod name must not contain spaces or underscores. It must be as short as possible, and you must exclude words like "WIP" or "Mod". Example: Colourful_Skins_Mod should instead just be ColourfulSkins.
You CANNOT change this name once it's created, and it's an extremely important part of your mod, so name it wisely.
Do NOT name your mod "WIP", "Test" or anything similar. You cannot rename your mod, so even if it's complete it will always display "WIP" or "Test".
INFO
IF YOUR MOD IS CALLED "TEST" "EARLY ACCESS" "WIP" or otherwise implies that your mod is not finished, we will not allow it to be publicly released and you will have to create a new mod instead with an acceptable name.
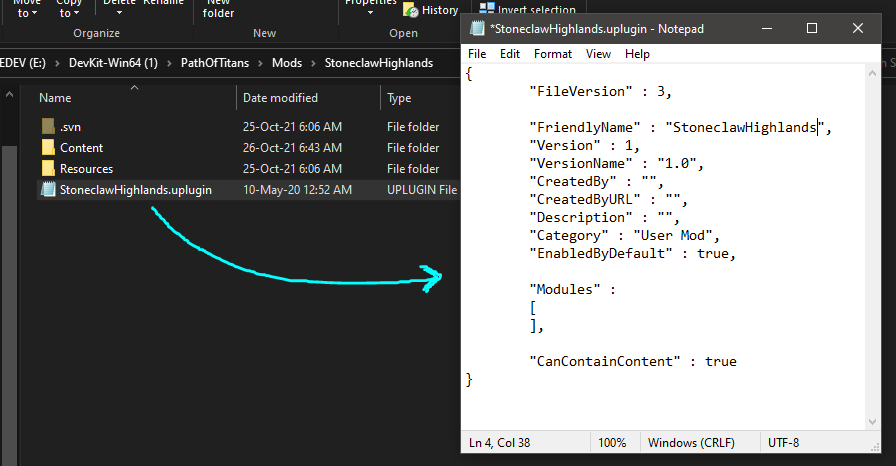
Below is an example of how your .uplugin file should look.
Step 2: Creating Your BP_ModData
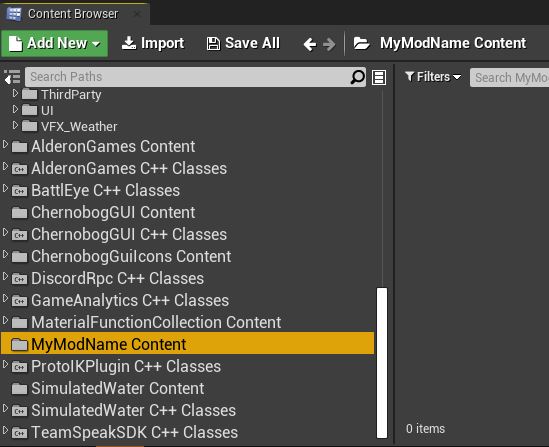
- In order to see your mod folder, you must enable “Show Plugin Content”. This can be accessed by clicking the View Options dropdown menu in the bottom right of the screen and ensuring this option is enabled.

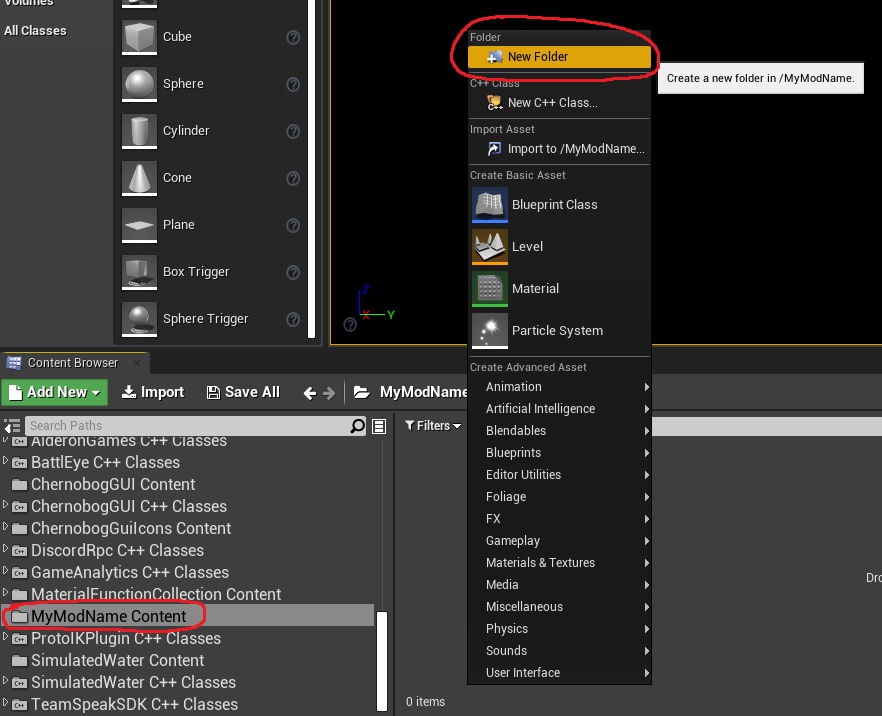
- On the bottom left side of the screen you will now see numerous directories that contain game files. Here you will also find your mod folder (you may have to scroll down slightly to find it). Click on this folder to open it.
- Right click inside your mod folder and create a new folder named “Blueprints”.
- Within the Blueprints folder, right click and create a new Blueprint Class. A window will pop up titled “Pick Parent Class”. At the bottom of this window, search for “moddata” in the search box and select “IModData”. Then click the green “Select” button.
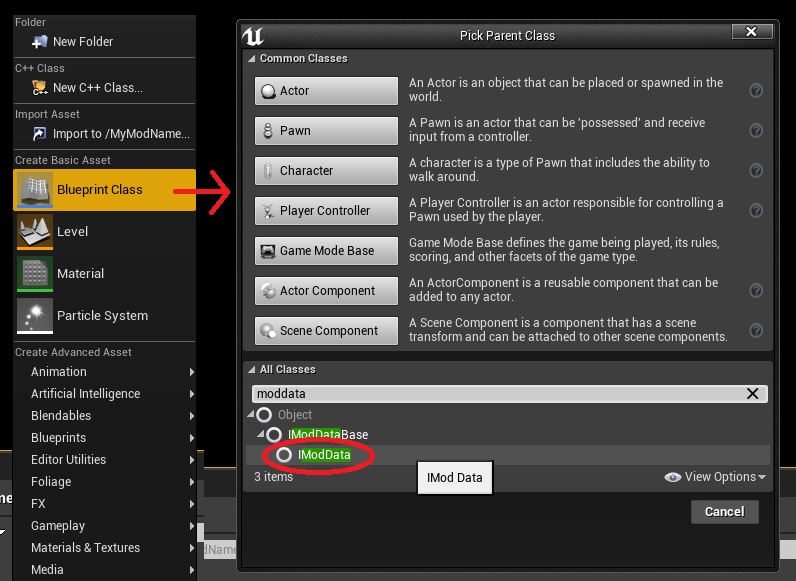
A new blueprint will be created. You MUST name this blueprint “BP_ModData”. If it is not named this exactly, your mod will not work when compiled to run with Path of Titans.
Open your BP_ModData by double clicking on it. Inside, you will see a “Mod” category with different types of mod items available. Depending on the type of mod you are creating, this will be important to set up with your respective mod content. You can find more information about how to set up the ModData_BP here.
WARNING
When creating your mod, ALL YOUR MOD'S CONTENT MUST be placed inside your mod folder. You cannot simply add or edit existing files within the “Content” folder as it will conflict with the base game. If you want to edit any assets, you must duplicate them into your mod folder and edit them within there. If you are importing brand new assets, you will have to move them into your Mod's Content folder.
Congratulations! You have successfully created and set up your first mod. From here you can begin adding content, creating maps, and modifying existing assets.
Developer Tip: Backing up your Mod
The Mod folder you created will contain all the content of your mod. If you Copy + Paste this folder to a different location you can create a backup of your mod in case the one in the Dev Kit gets broken in some way. Whenever you update your Dev Kit, make big edits, delete a lot of assets, etc. you should ALWAYS backup your mod folder.
To backup your mod, simply copy this mod folder and save it to a secure location, ideally to a completely different hard drive. It is extremely highly recommended to periodically backup your mod while working on it.