Creating Rivers and Water Sounds
Your map may need rivers or streams linking different water bodies. We suggest using our built-in tools to accomplish this.
INFO
Rivers currently do not support being swimmable unless they are perfectly flat. If they are flat, you can assign a physics volume to their area which should make them swimmable.
Creating Rivers
Step 1 - Creating River Spline with River Tool
- With your mod map open, go to
Content/Blueprints/Waterand selectBP_WaterSpline - Drag the WaterSpline blueprint into your level.
- You will see a small white dot on the river spline you just created. Select it and drag it around to lengthen your river.
- Hold down
ALTon your keyboard and drag the white dot to create a new spline node. - Create as many spline nodes as needed to create the length of your river. If you drag your node up or down, it will automatically create a waterfall.
TIP
- Create your river starting from source to end, that way the water will flow in the correct direction.
- You can change the width of the river by changing the XYZ scaling of the spline point.

Step 2 - Turning Spline into Mesh
Once you have created your river layout, we need to merge it into a static mesh so it can be drinkable by creatures.
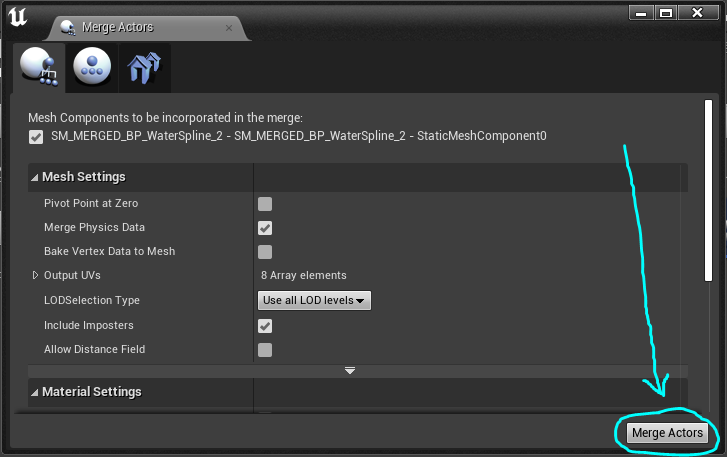
- To to
Window > Developer Tools > Merge Actorsto open the Merge Actors window. - Select your river spline, and Click "Merge Actors". This will turn your river spline into a fixed mesh. You cannot edit the river after completing this step, so ensure your river is correctly shaped before clicking "Merge Actors"
- Save your newly created river mesh into your mod folder.
Step 3 - Create River Base Blueprint
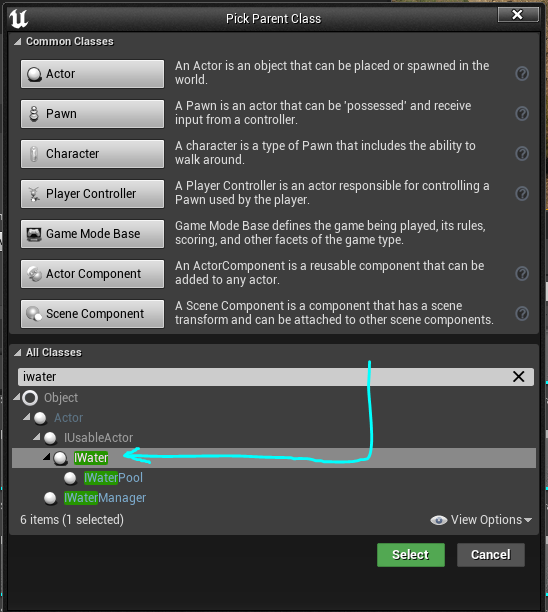
- Inside your mod folder, right click and select
New Blueprint Class. - In the "Pick Parent Class" window, select "IWater" and click "Select" to create a new blueprint.
- Name the new blueprint something descriptive, such as
BP_MapName_RiverBase
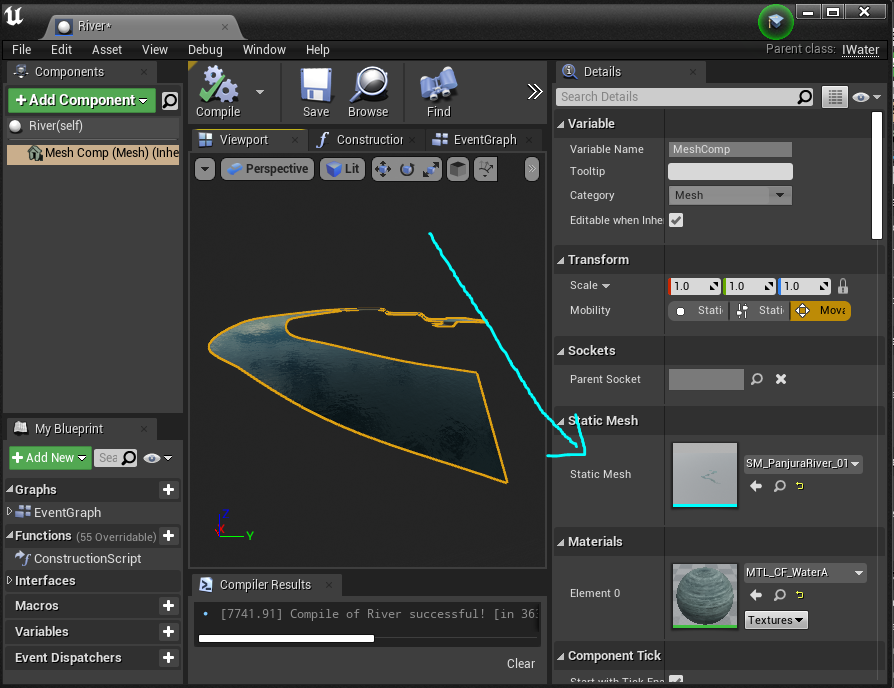
- Open the River blueprint and assign your river mesh to the StaticMesh section.
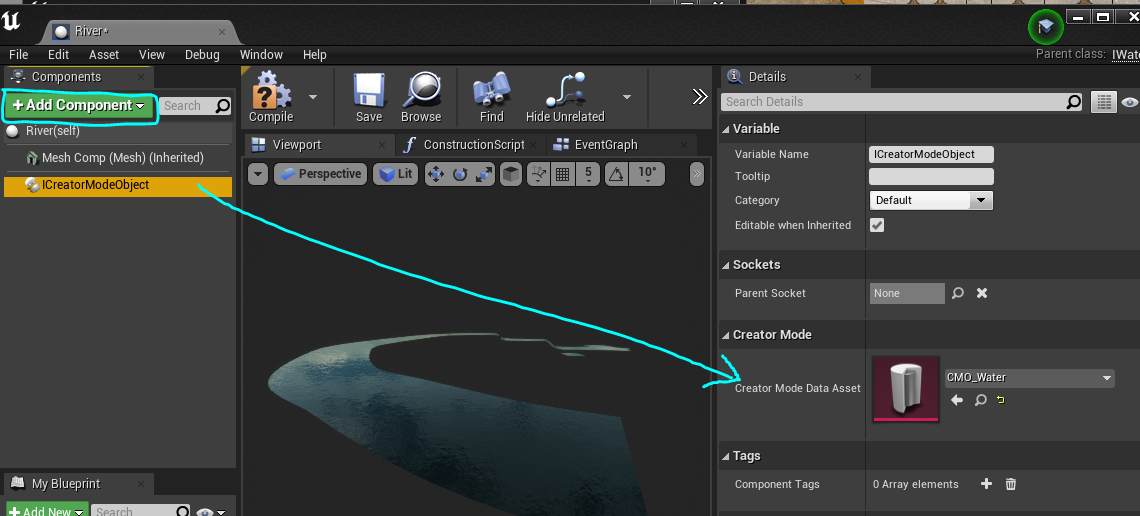
- In the river blueprint, select "+Add Component" and add an
ICreatorModeObject - Select the ICreatorModeObject and assign
CMO_Waterto the Creator Mode Data Asset.
Step 4 - Create Individual River Blueprints
- Right click on your
BP_MapName_RiverBaseriver blueprint and selectCreate Child Blueprint Class - Name your newly created blueprint
BP_MapName_RiverNameand ensure you save it into your mod folder. - Assign your river mesh to this blueprint. If you have created multiple river meshes, you should create multiple Child Blueprints and slot a mesh into each blueprint.
- Drag your river mesh into your map. Position it exactly in the same place as the old Spline, then delete the spline. This will leave just 1 river mesh remaining.
- Ensure your river blueprint is correctly assigned to its sublevel.
- Additionally, ensure you assign a Water Tag to your river, as explained here in Step 3: Adding Tags to Water Bodies
Adding River Sounds
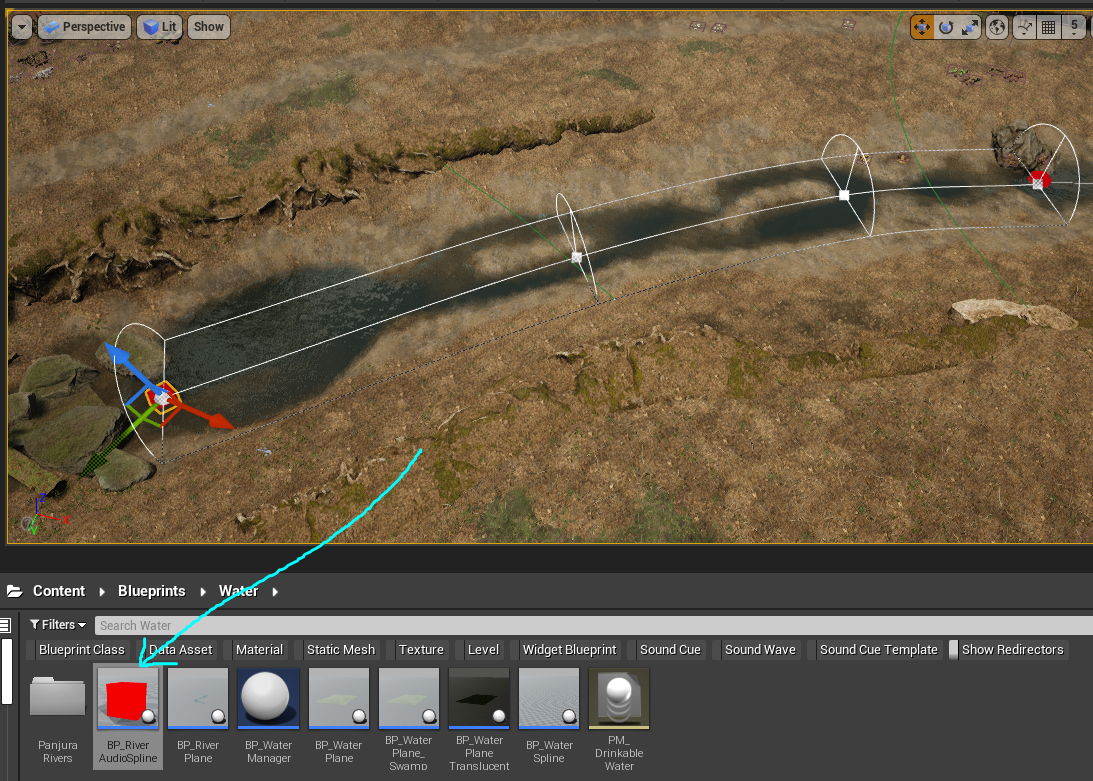
- Go to
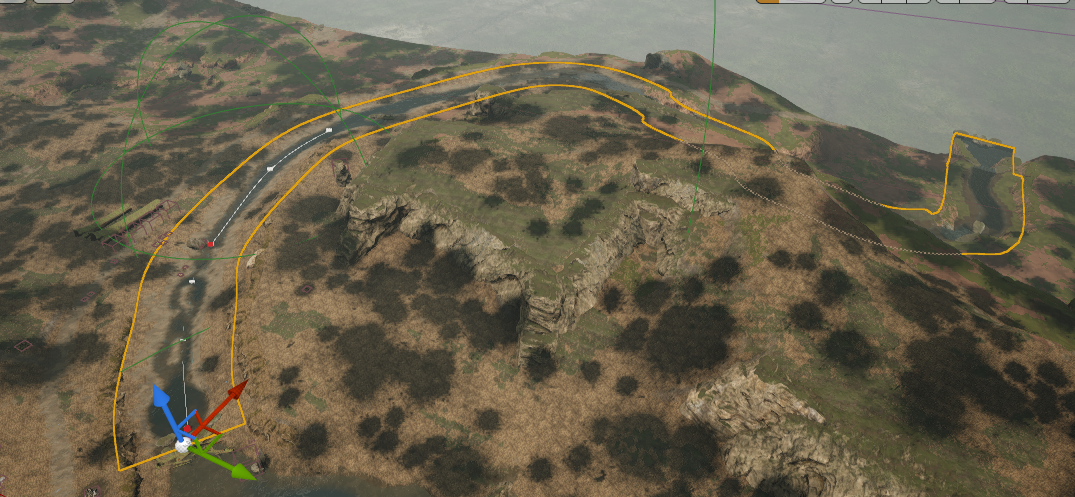
Content/Blueprints/Waterand dragBP_RiverAudioSplineinto your level. - Select the small white spline point and drag it out along your river length.
- Hold
Alton your keyboard and drag to create a new spline point. - When you are finished, it should look similar to the image below.
- Ensure your river audio spline is correctly assigned to its sublevel.
Summary
In this tutorial you completed the following:
- Use the spline tool to create river splines.
- Converted the river splines into a mesh.
- Created a river blueprint and assigned the river mesh.
- Added river audio spline to your rivers