Add Points of Interest (POIs)
POIs are large volumes that are placed on your map's persistent level. These will create areas you assign quests to, so be sure to place POIs over the areas you want to have quests.
Step 1 - Place POI On your Map
- Open your map and ensure you have the persistent level selected.
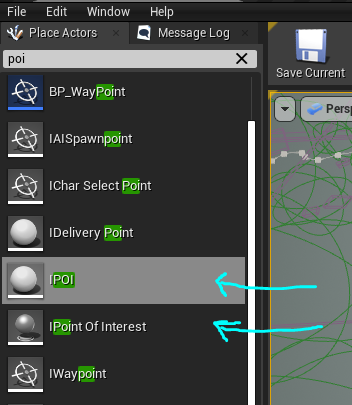
- Go to the Place Actors tab and search for "POI"
- Place either a
IPOIorIPoint Of Interestdown on your persistent level.
| BP Name | Description |
|---|---|
| IPOI | This POI blueprint allows you to use a custom shape for your POI volume. Useful if you want to cover a weirdly shaped area, like a long river or an underground cave. |
| IPoint Of Interest | This POI blueprint will use a sphere for your POI volume. Useful for most large areas like a lake or meadow. |
- Place down all your POIs on your map wherever you see fit.
- POIs MUST NOT OVERLAP! If they overlap they will break and cause issues. You cannot overlap POIs even if they share the same Tag and Name, they will still break
Step 2 - Set Up Tags and Name
Walking into a POI will trigger a pop up toast with the message "Entered POIName". With this, you can name areas of your map.
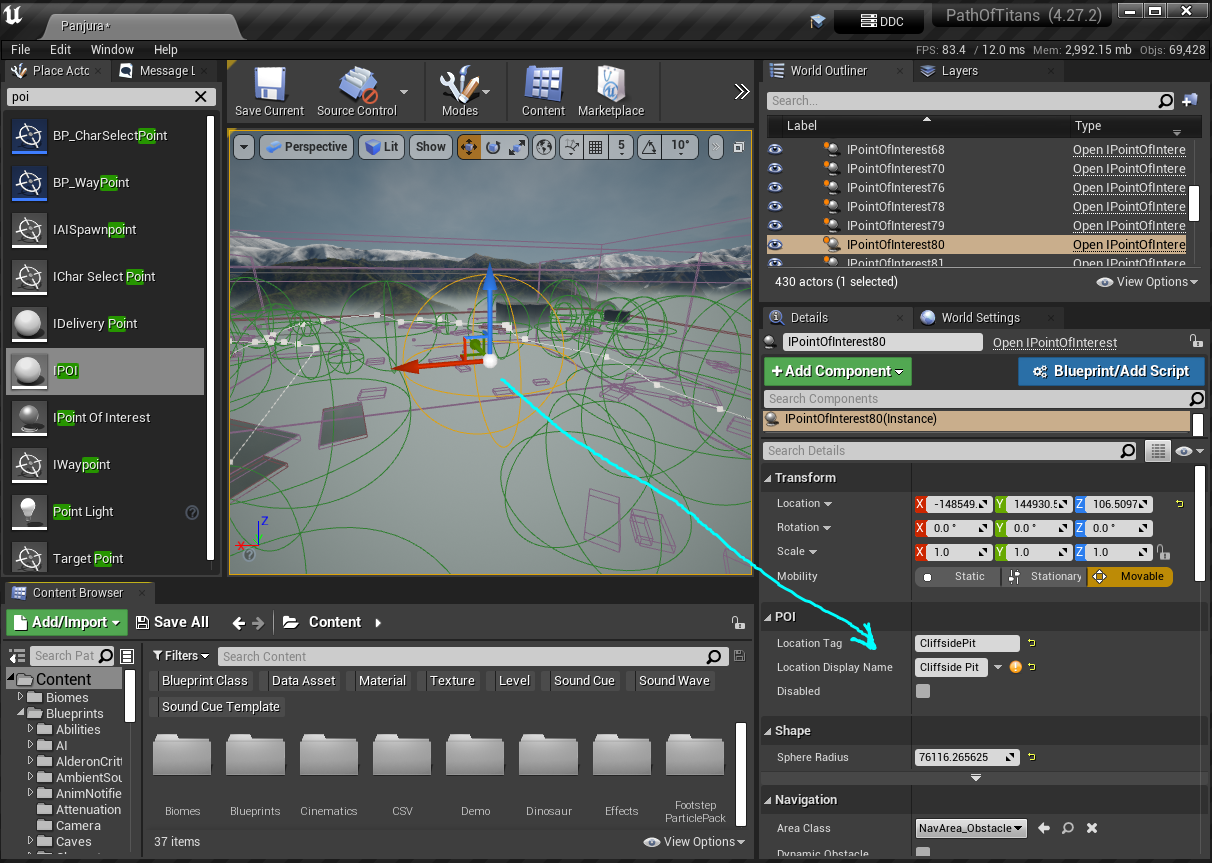
- Click on your POI and go to the Details panel.
- Set the following settings:
| Name | Description |
|---|---|
Location Tag | This is the unique tag your must assign your POI. It cannot contain spaces or start with a number. This tag cannot be shared with any other POI otherwise it will break. |
Location Display Name | This is the name that players will see when you walk into your POI. It can contain spaces, numbers, etc. |
Disabled | If you want to disable a POI, check this box. This lets you disable a POI without deleting it, in case there are bugs or you want to edit something. |
Summary
By following this tutorial you will have completed the following
- Placed down POI blueprints
- Assign POI tags and names to each blueprint