Creating Move-To Quests
This article will teach you how to set up "move to" quests, show you where some examples are, and tips to help automate the process.
Step 1: Create a "Move To" Quest Task
Quests have a list of tasks that must be complete for the quest to finish. So first we need to create a new "Move To" task.
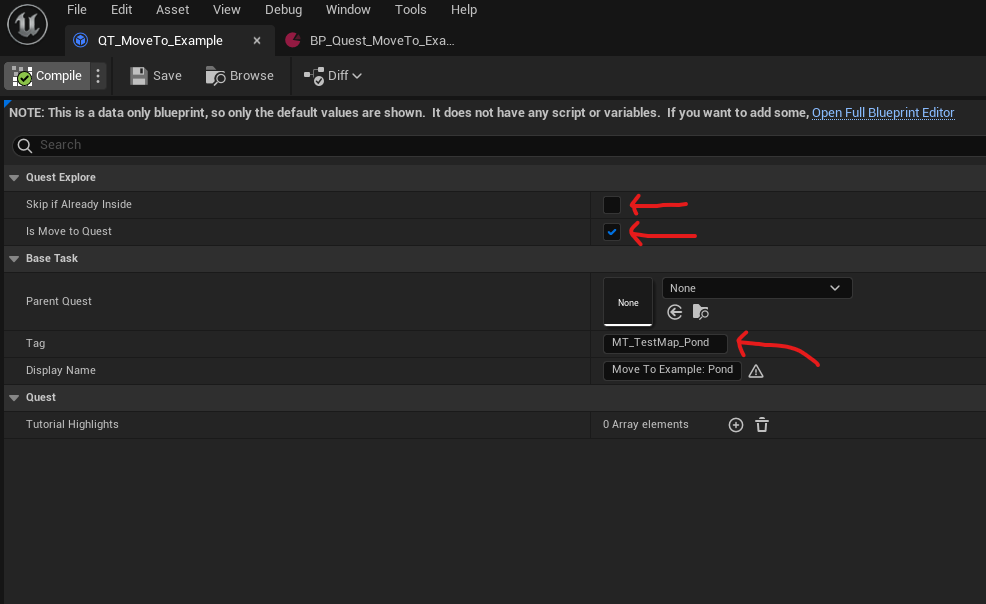
A "Move To" task is just an "IQuestExploreTask" with a boolean enabled. You can either create a new "IQuestExploreTask" or duplicate an example found in Content/Blueprints/Quests/MechanicsTestMap/Tasks/QT_MoveTo_Example. Make sure your new task is placed into your map's respective "Tasks" folder (Content/Blueprints/Quests/(Your Map's Name)/Tasks/).
When creating a new "Move To" quest, make sure that the Is Move To Quest is enabled, Skip if Already Inside is disabled, and make sure to use a unique location tag in the Tag section. The recommended format for tags is "MT_(Map or POI name)_(Move To Name). In this case, "TestMap" is the name of the map, and "Pond" is the name of the Move To task.
WARNING
Keep note of what you type into the Tag section, as that exact tag will be needed on the Actor blueprint later.
Step 2: Create the Quest Blueprint
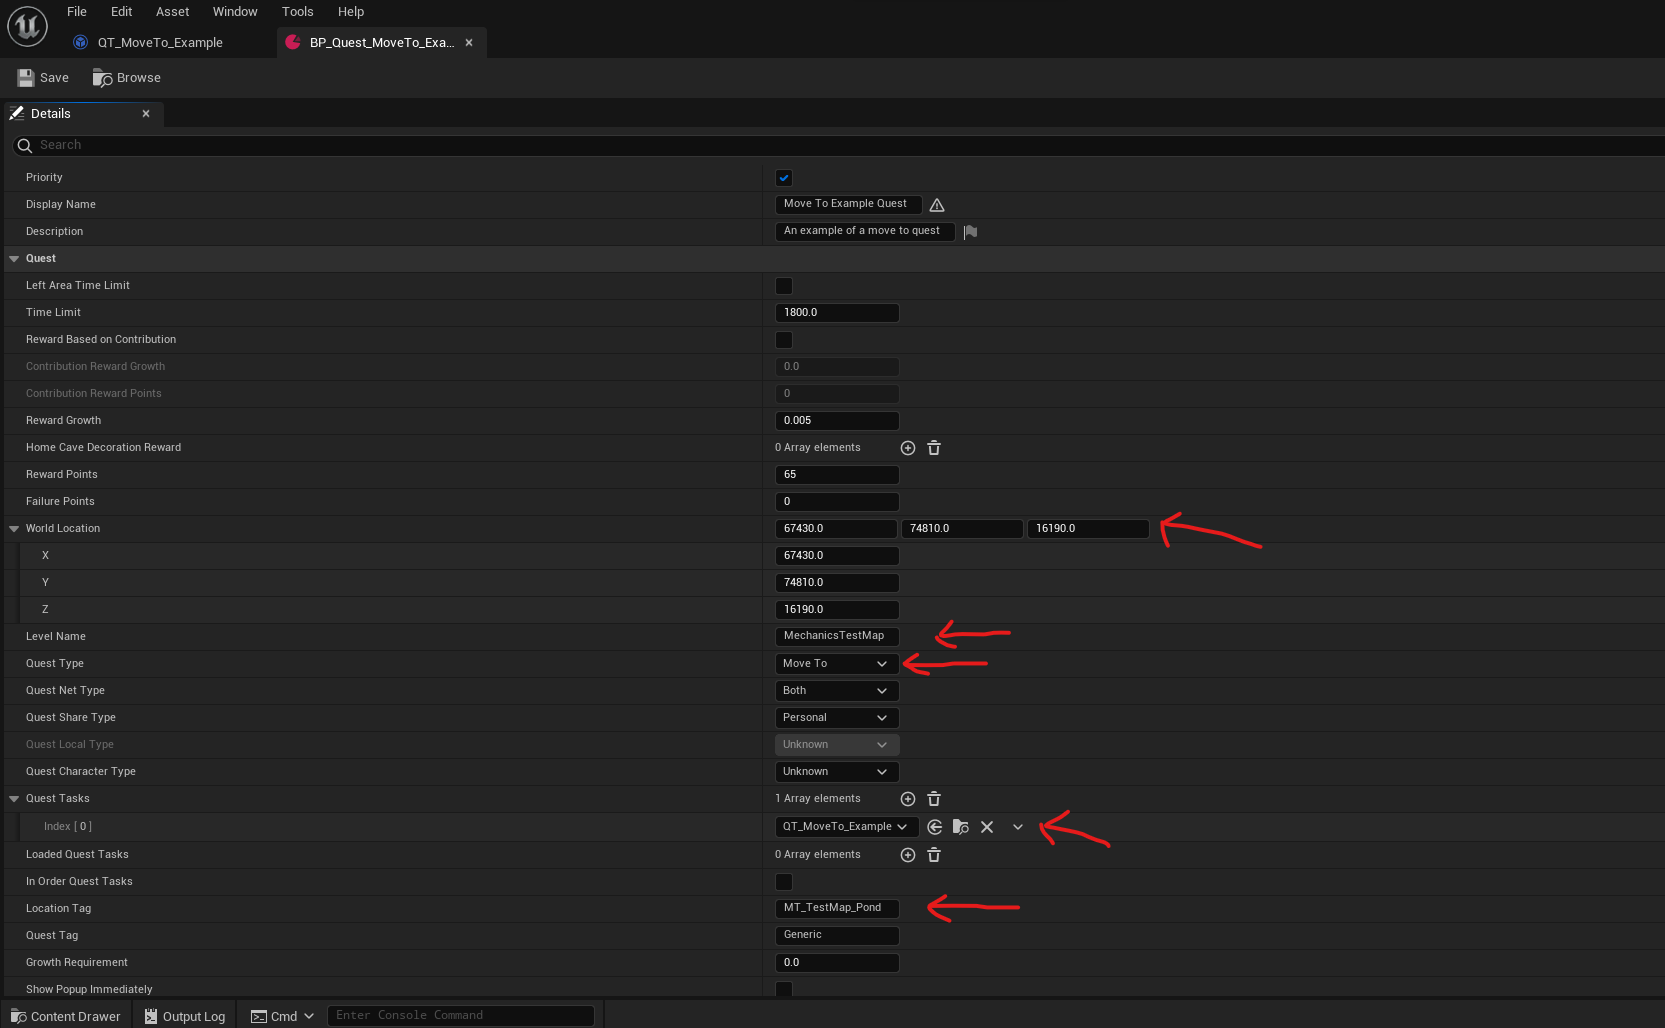
You can create a new QuestData blueprint, or duplicate the example found in Content/Blueprints/Quests/MechanicsTestMap/Both/Any/BP_Quest_MoveTo_Example. Make sure your Quest Blueprint is in the respective quest folder (Content/Blueprints/Quests/(Your Maps's Name)/Both/Any/).
First, make sure the Level Name is the correct map were you want the quest to appear.
Then, Set the Quest Type to "Move To"
Next, In the Quest Tasks list, make sure to reference the "Move To" task that you created previously.
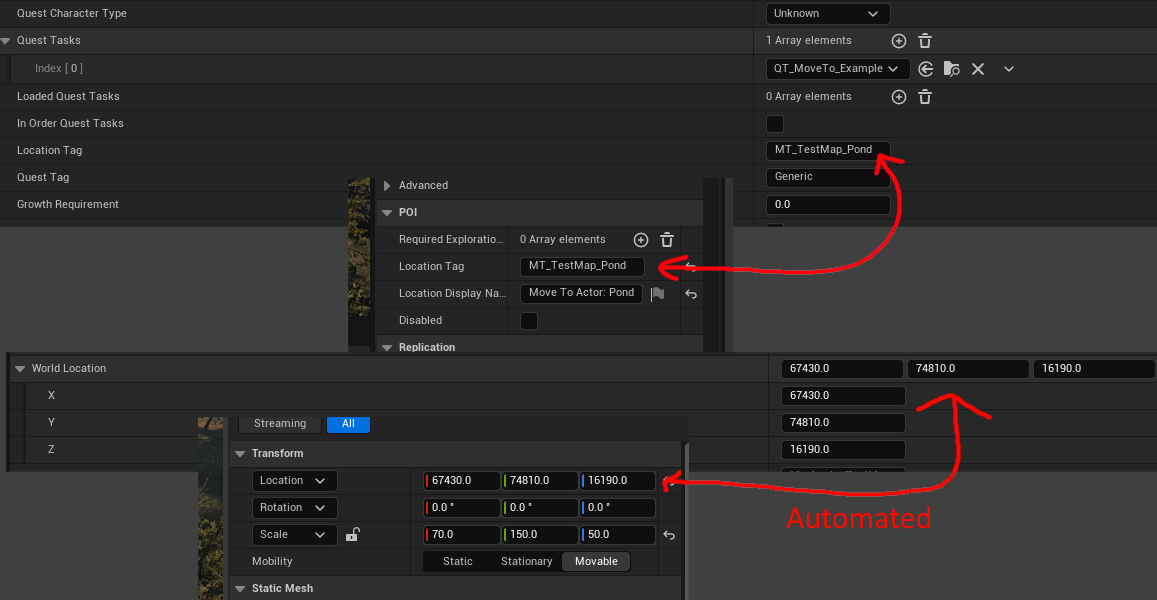
Set the World Location to where you want the HUD element to point to. This can be set later after the IMoveToQuest actor is placed in the world.
Optional: Set the Location Tag to be the same as your task Tag. It will automate the World Location setting by automatically setting the World Location when you move the IMoveToQuest actor in the world.
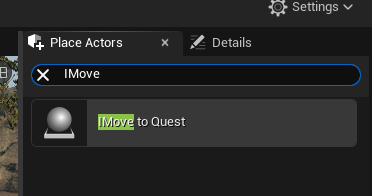
Step 3: Add a IMoveToQuest actor into your map
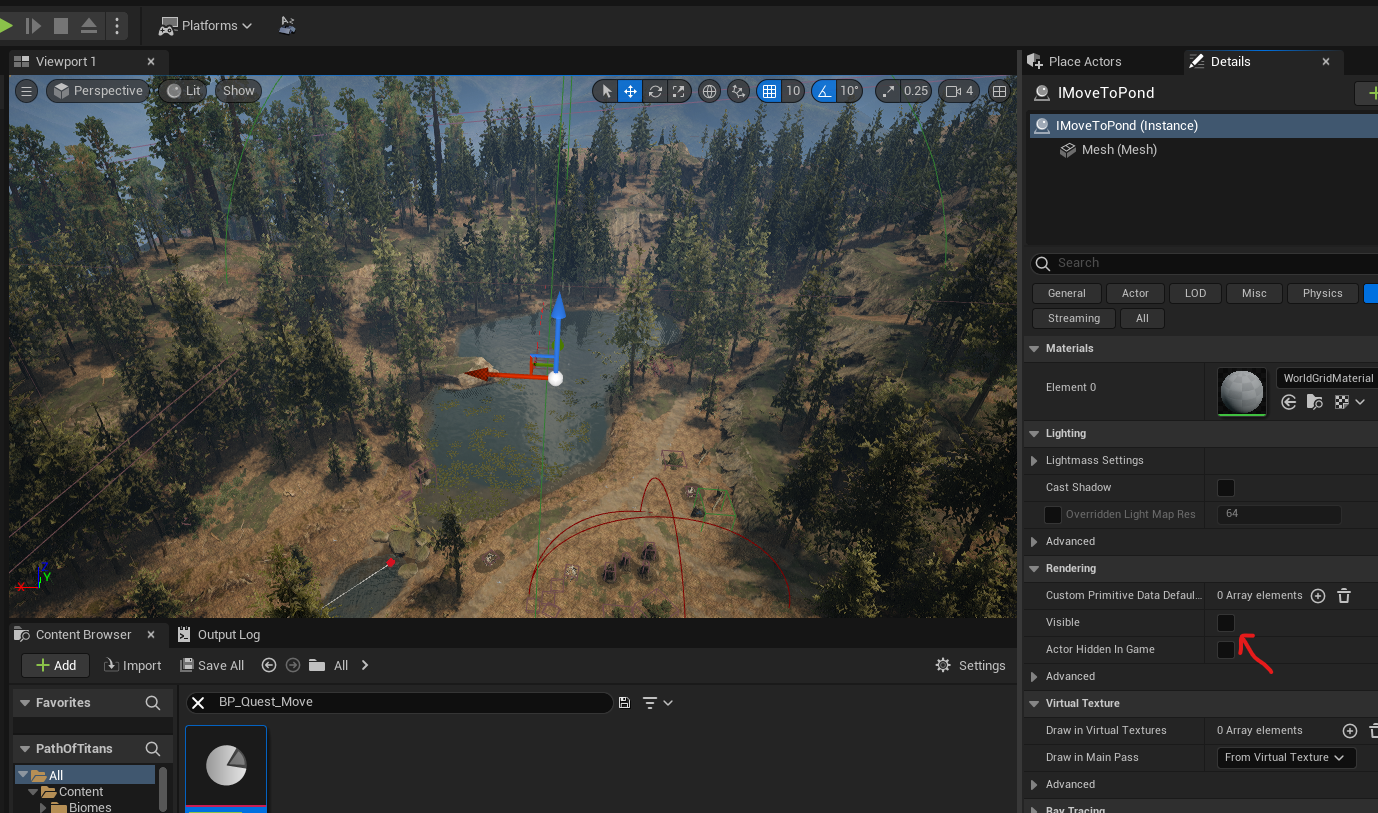
First, search up "IMoveToQuest" into the Place Actors panel. You should see an "IMove to Quest" actor. Place that actor within your world or sublevel.
In the "POI" section of the actor details, set the Location Tag to your Task's Tag. If you do not do this, the quest will not complete upon entering the area.
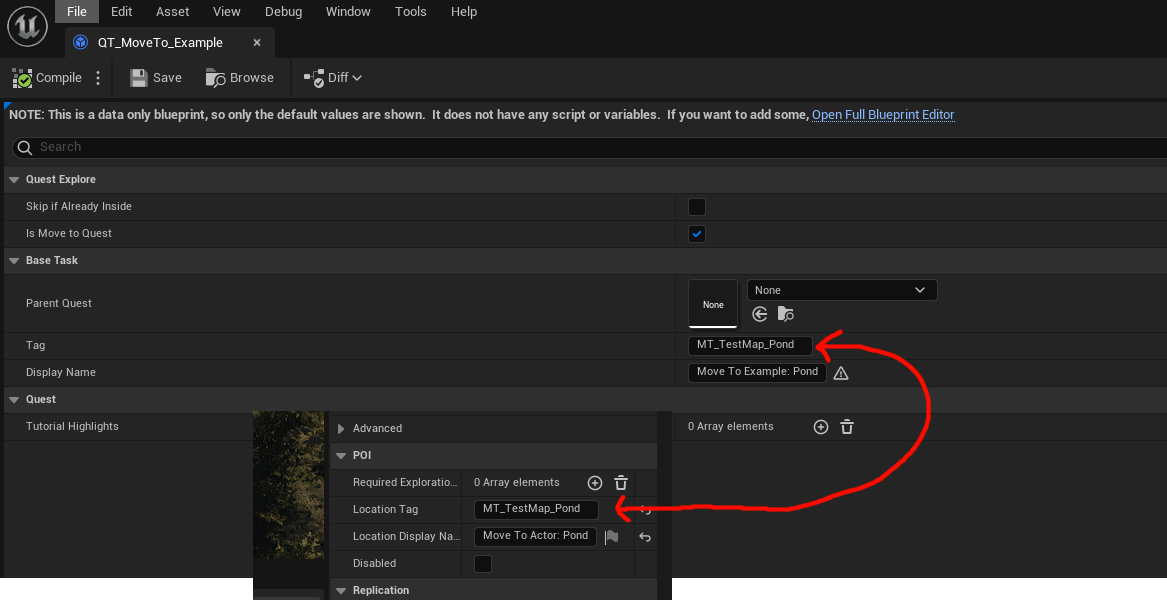
Optional: If you set your Quest Blueprint's Location Tag to this tag as well, then the World Location in the Quest Blueprint should automatically change as you move the IMoveToQuest actor around in the world.
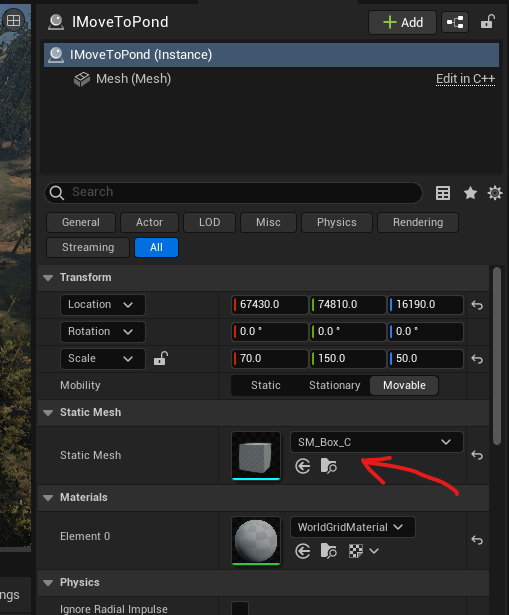
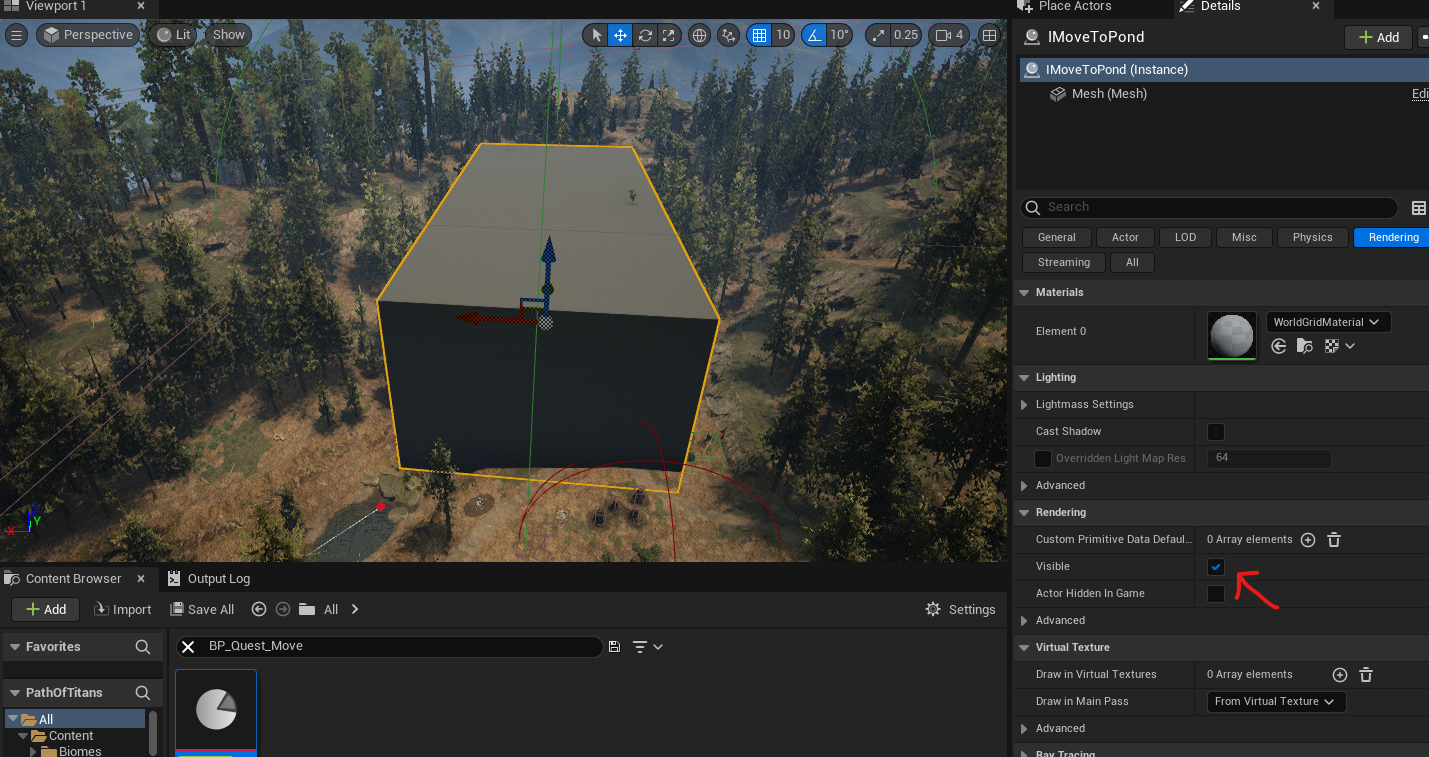
Next, set the "IMoveToQuest" Actor's Static Mesh. When the player goes inside this mesh, the Move To quest will be considered completed.
If you would like to hide the mesh while in editor, uncheck the Visible checkbox in the "Rendering" section. The mesh will automatically be hidden while in-game, so this is optional.
That's it! You should now be able to create any "Move To" quest and place them through out the map!