Adding Creator Mode Objects
Creator Mode Objects are objects that can be manipulated in the game world by an admin in "Creator Mode". These can be anything from berry bushes to AI characters.
Video tutorial here:
Adding a New Creator Mode Object
- Create a blueprint which will be your new object. Somewhere in the
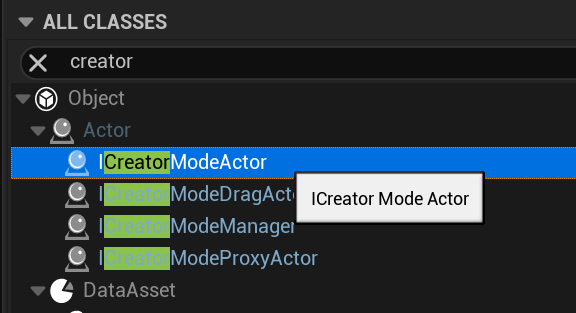
Blueprintsdirectory, create a new blueprint of any actor inheriting fromICreatorModeActor. In this example we are using a rock, and naming the blueprint BP_CreatorModeRock. Ensure the actor has atleast one static or skinned mesh component.
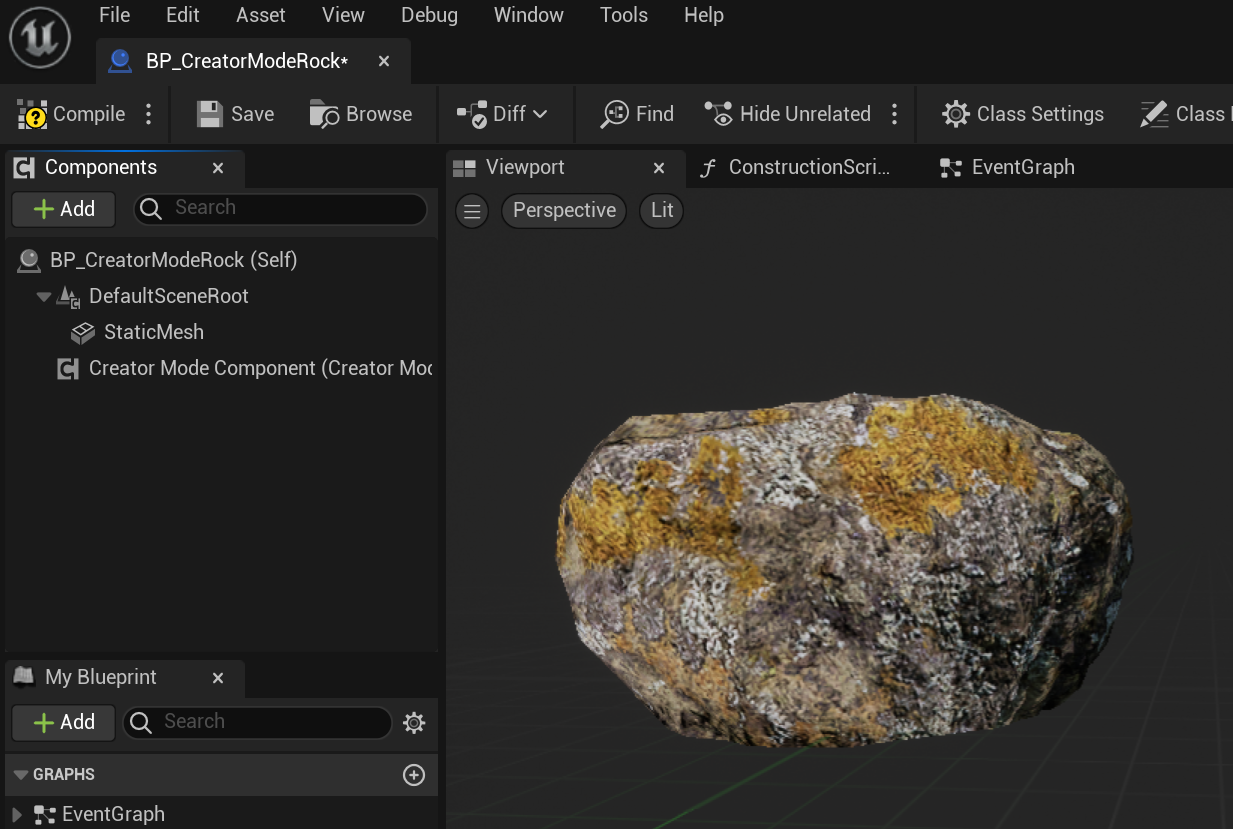
Open the blueprint editor for BP_CreatorModeRock (or the actor you created), and set
Replicatesto true. It must be set to true, or else the object will not spawn on clients.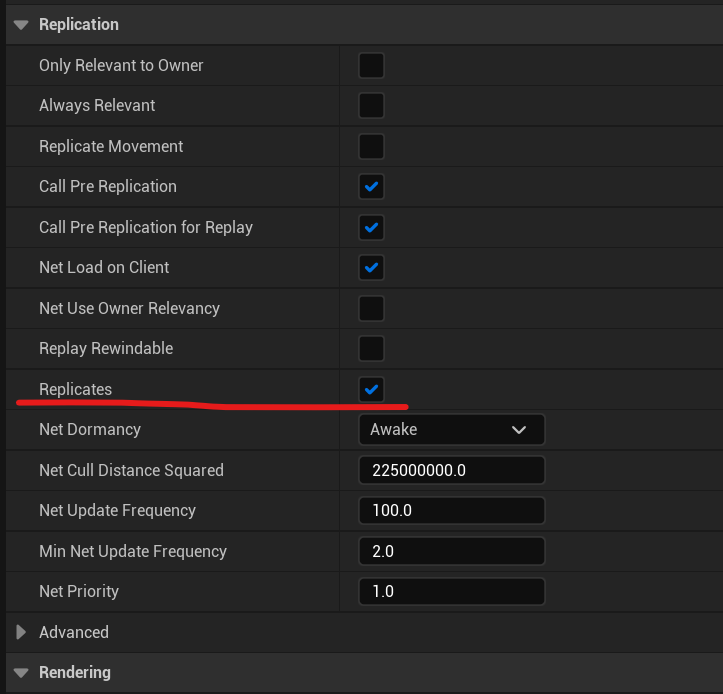
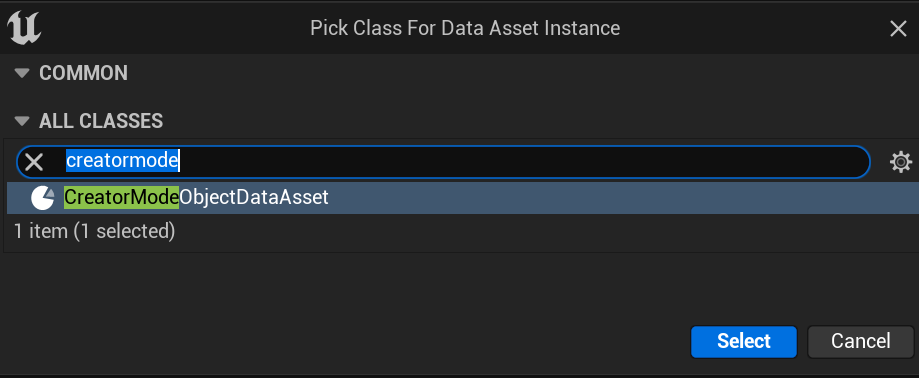
In the
Blueprints/CreatorModeObjectsfolder, create a new data asset inheritingCreator Mode Object Data Asset. Name it something such as "CMO_CreatorModeRock". Open it to edit the values.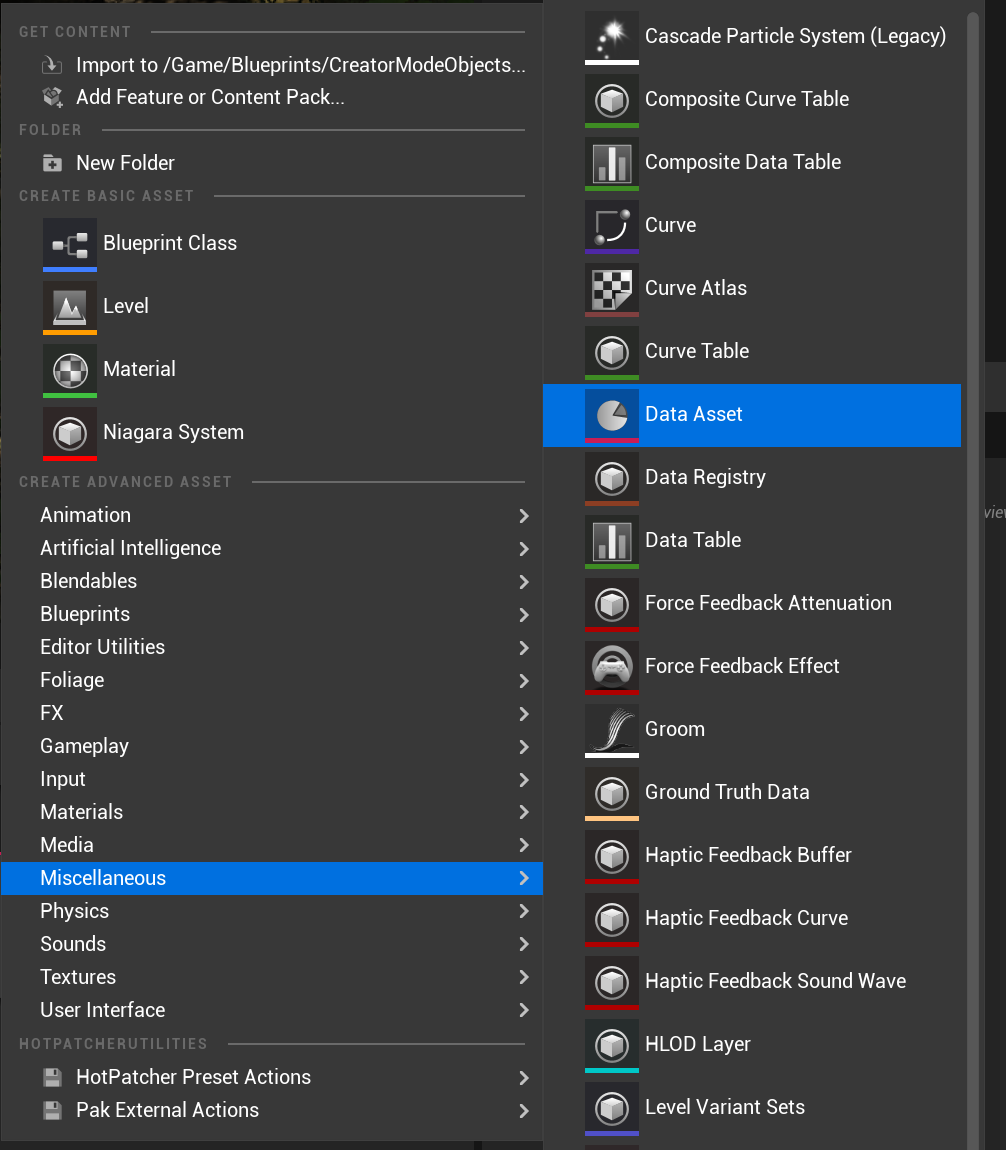
The
Objectfield must be set to the Creator Mode Object you created instep 1.Configure the data asset to your liking. Here is an explanation of what all the variables do:
ObjectThe Creator Mode Object that the data asset will load when selected.Proxy ActorAn Actor that is spawned on the server to run a function on to determine different things, i.e. if the object can be spawned. Create an actor derived fromICreatorModeProxyActorin order to create one of these.Placement CostThe cost that the object will use when placed. This is recommended to be set to0for non-permanent objects (like meat chunks) and10for permanent objects (like berry bushes).Display NameThe display name of the Creator Mode Object.Icon TextureThe icon to display for this object in the Creator Mode Object Browser.Can Be PlacedDetermines if new instances of the object can be spawned. (For example, water can not be placed but can be edited)Can Be DeletedDetermines if instances of the object can be deleted. (For example, water can not be deleted but can be edited)Can Be DraggedDetermines if instances of the object can be dragged.Rotate To TerrainDetermines if the object will rotate to the terrain when placing or dragging. (For example, Characters can not use this)Use Proxy Object to Determine if PlaceableIf true, the server will spawn the specified proxy actor and use its function to determine if the object can be placed. Useful for objects which rely on different things in the world in order to be spawnable or not.CategoryThe category for the object to be sorted with. This is localized. Here is the setup for this example: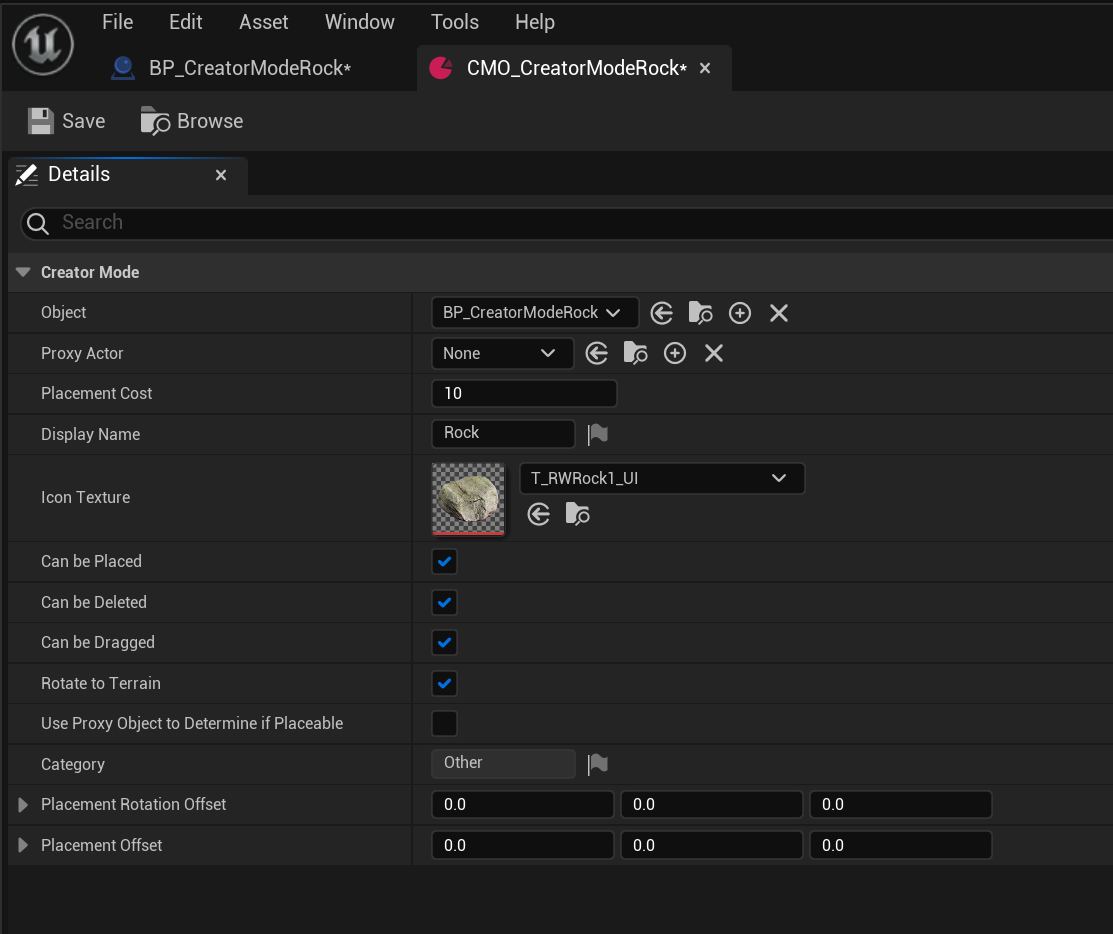
In the settings for
BP_CreatorModeRock, select theCreator Mode Componentcomponent, and set theCreator Mode Data Assetvariable to your data asset.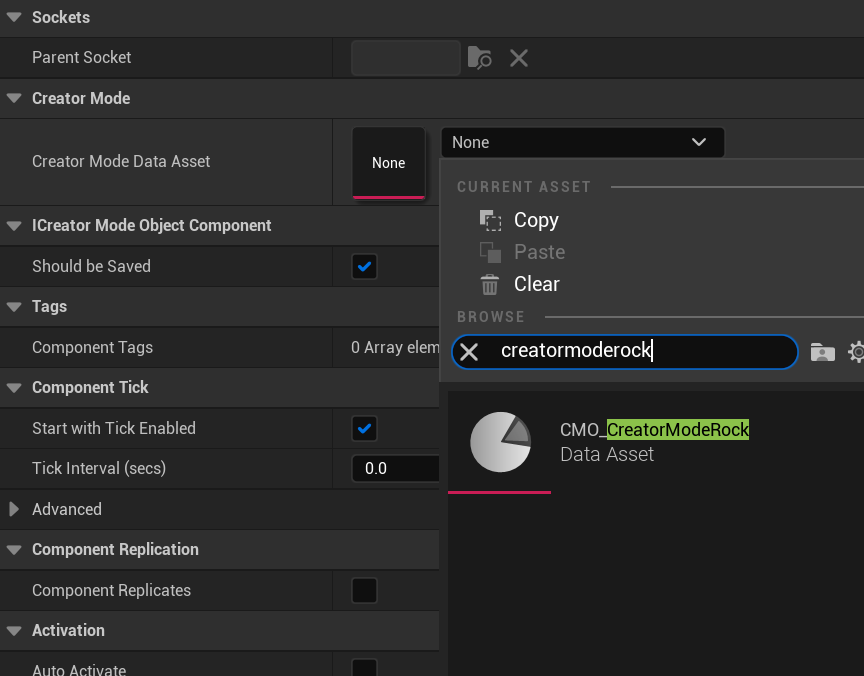
Test! If something goes wrong, make sure you backtrack through the steps and make sure everything is configured correctly. If all goes well, you should be able to select your object in the
Objectscreator mode window, and place it!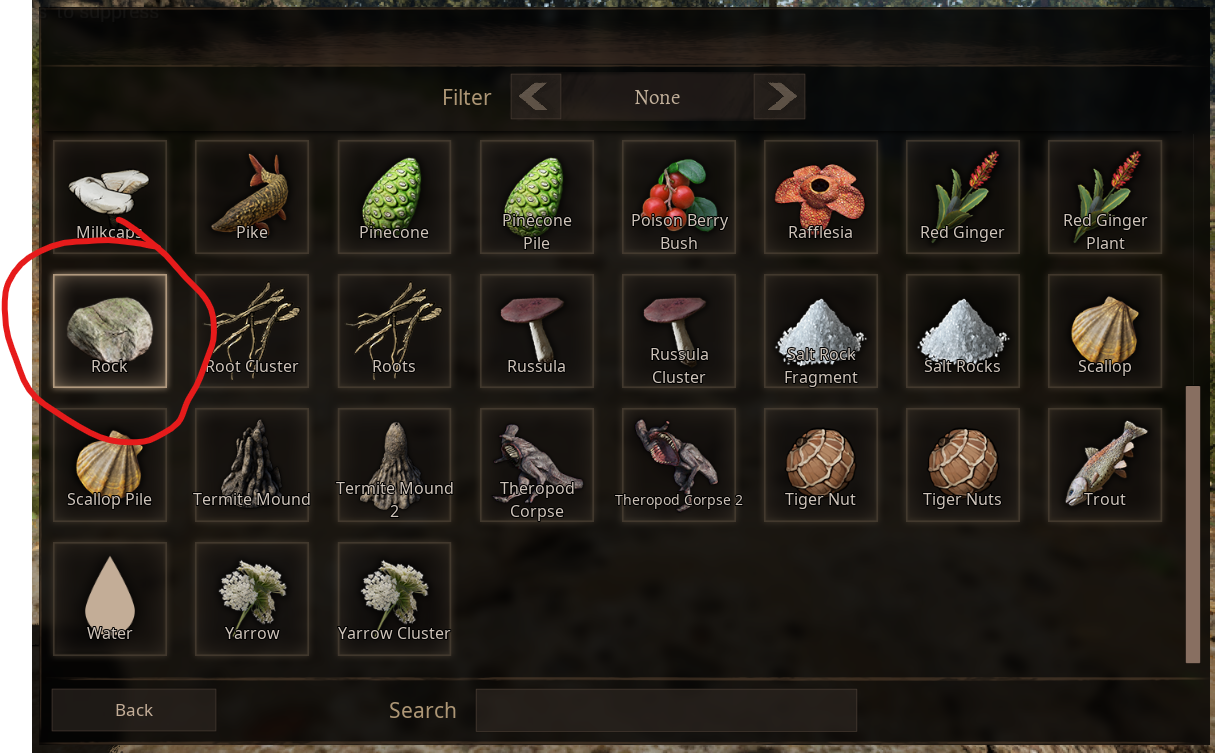
If you select the object, you might notice it doesn't have an outline. To fix this, in the event graph, override the functions
Event On Become Focus TargetandEvent On Stop Being Focus Target.
Now, you need to set up the render depth and stencil values for the meshes in the actor. There is only one static mesh in this example, so we will use that. Drag the static mesh variable into the event graph, and pull off from its pin to search. Search for
Set Render Custom Depthand add the node to the graph, and link theExecutepin ofEvent On Become Focus Targetto it. SetbValueto true.Do the same for
Event On Stop Being Focus Target, except withbValuebeing false.From the
Event On Become Focus Targetexecution path, add another node from theStaticMeshcalledSetCustomDepthStencilValue. SetValueto 255.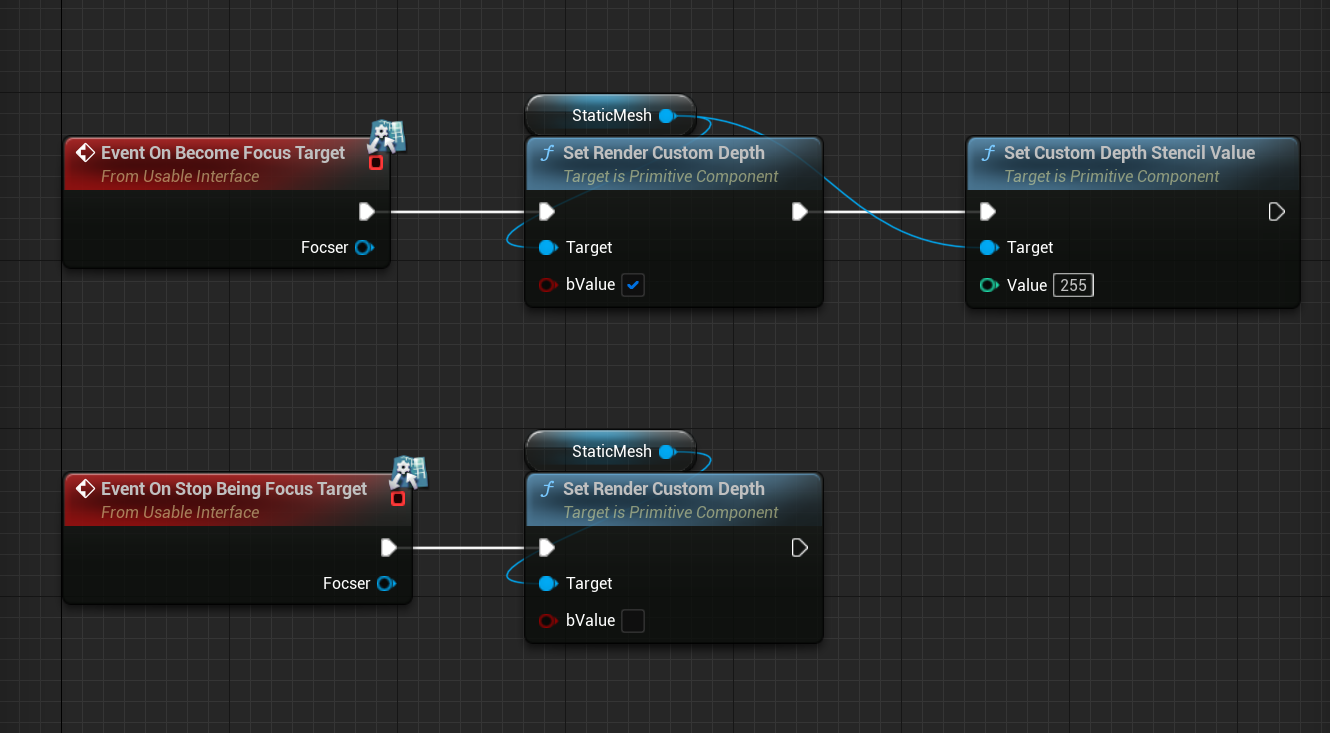
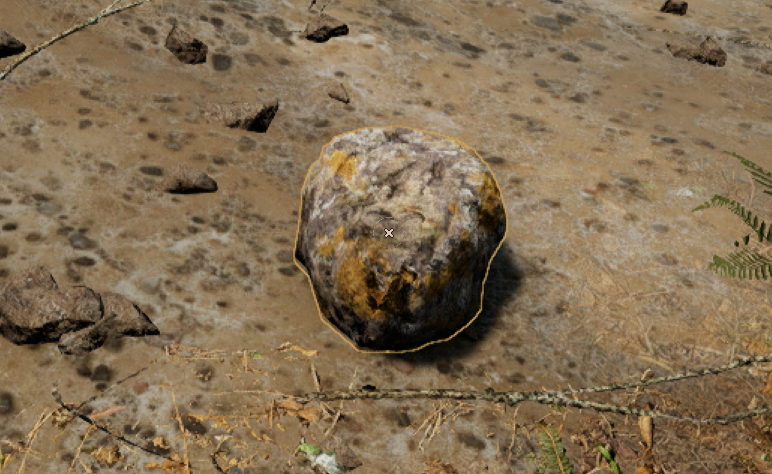
Now, your selected objects should have outlines!
Now that you have a creator mode object, you can go on to add some editable properties to it. With those, as an admin you can edit variables of the blueprint directly. Tutorial can be found here.