Setting Up Swimmable and Drinkable Water
Path of Titans requires very specific water setup for your creatures to function correctly. Water bodies also need to have a unique tag identifier and be assigned to a Water Manager if you want them to drain water quality and be replenishable.
Step 1: Placing Water Planes
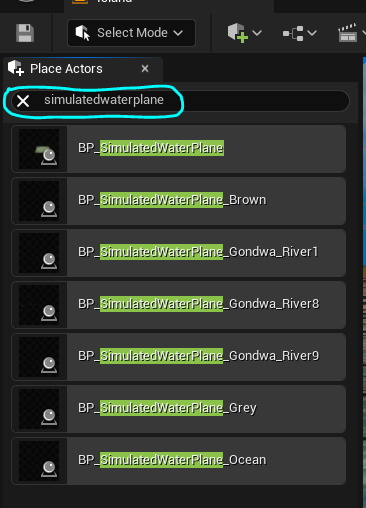
In order to place drinkable and swimmable water, you must use our dedicated water plane blueprint. You can place as many as you like on your level.
- With your level open, search for "SimulatedWaterPlane" in the Place Actors list. Alternatively you can go to
Content\Blueprints\Waterand useBP_SimulatedWaterPlane. - Drag the SimulatedWaterPlane into your map and place it as you see fit.
- Scale the water plane to be as large as you want. Make sure the water volume completely covers the area you want, including the bottom of the lake. Otherwise, players will dive and fall out of your water body.
- Do this for all water bodies you plan on having on your map. Make sure to place smaller water bodies into your map tiles/sublevels, and put extremely large water bodies into the persistent level.
Step 2: Adding Physics Volumes to Make Swimmable Water
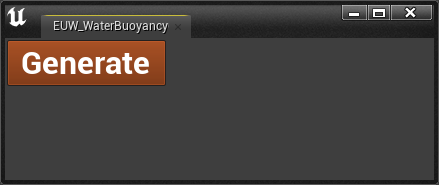
With all your water bodies placed, we can make the water swimmable. Path of Titans requires a particular physics volume setting and placement, so instead of placing these manually by hand, we can use the EUW_WaterBuoyancyGenerator Tool
- Go to
Content\Blueprints\Tools - Right click on
EUW_WaterBuoyancyGeneratorand selectRun Editor Utility Widget - With all your levels and sublevels loaded, click the "Generate" button.
- All your water bodies will now automatically have a physics volume placed at their exact locations. You can test the water physics by playing your level and swimming in some water (be sure to save first).
Step 3: Adding Tags to Water Bodies
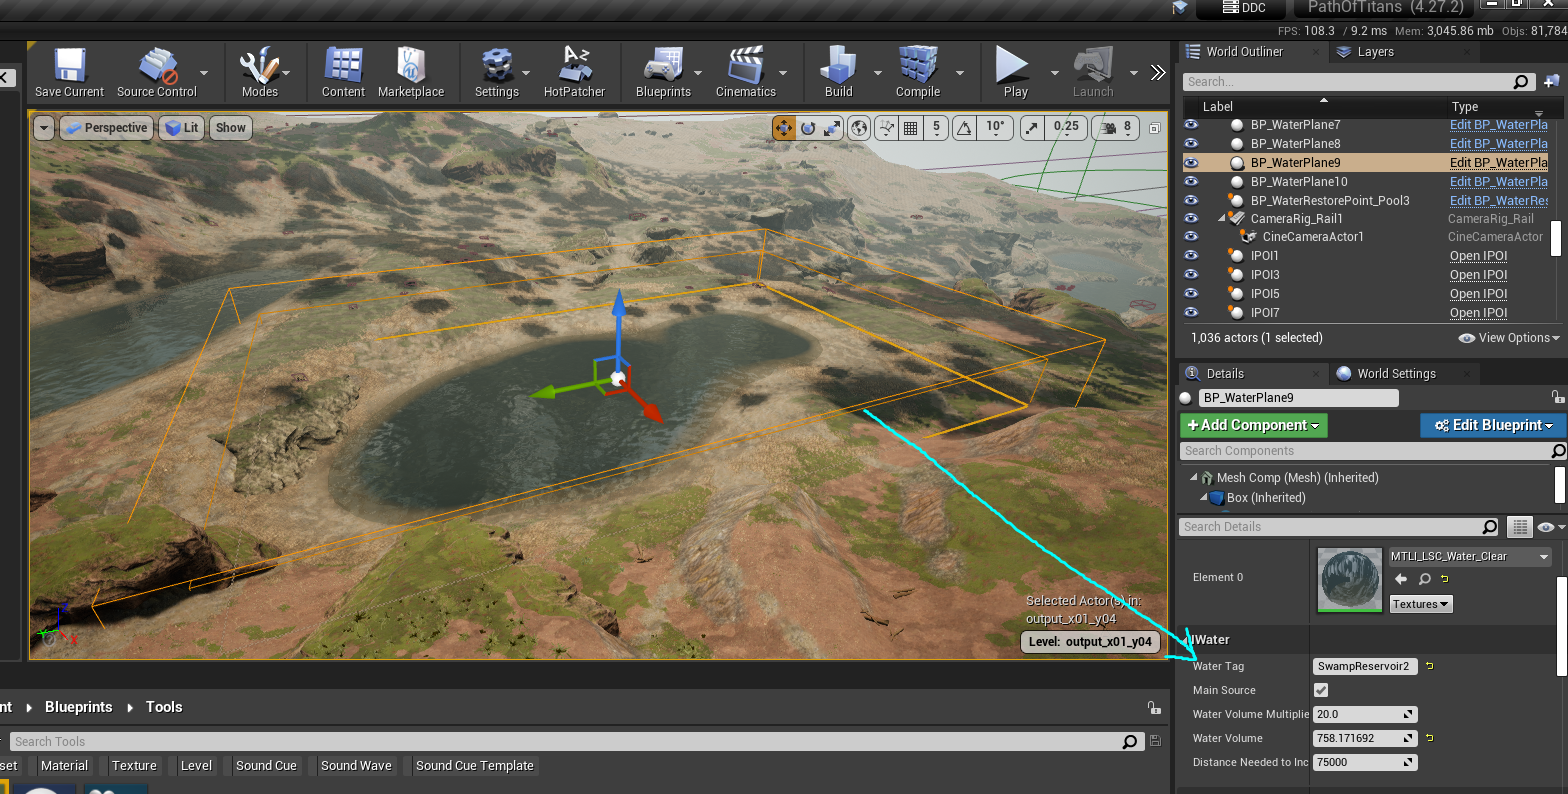
You must add a unique water tag to each water body. The game uses Tags to manage water quality and the amount of water this water body contains. If you do not add a tag, the water will never drain.
- Click on your water body and go to the Details panel.
- Scroll down and look at the "IWater" section.
- Type in a unique Water Tag name. This tag cannot be shared with other water bodies.
- Optionally, you can change the amount of water this water body contains with the
Water Volume Multiplier - Optionally, you can also change the water material this water uses.
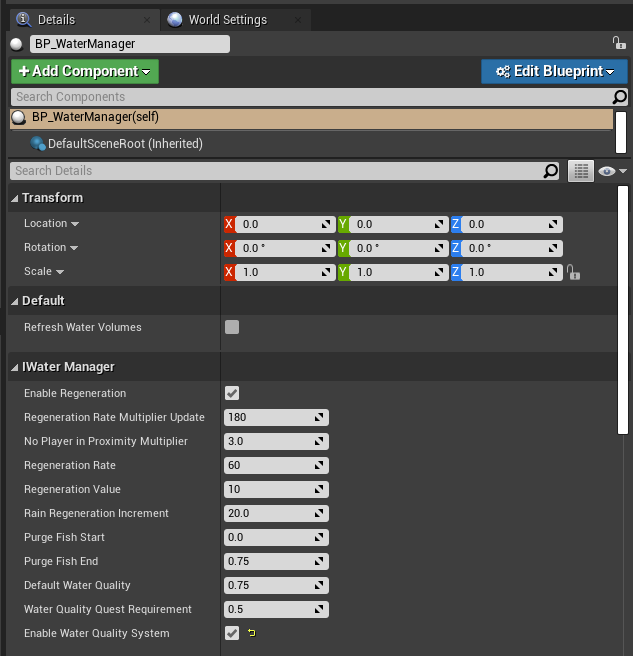
Step 4: Setting up the Water Manager
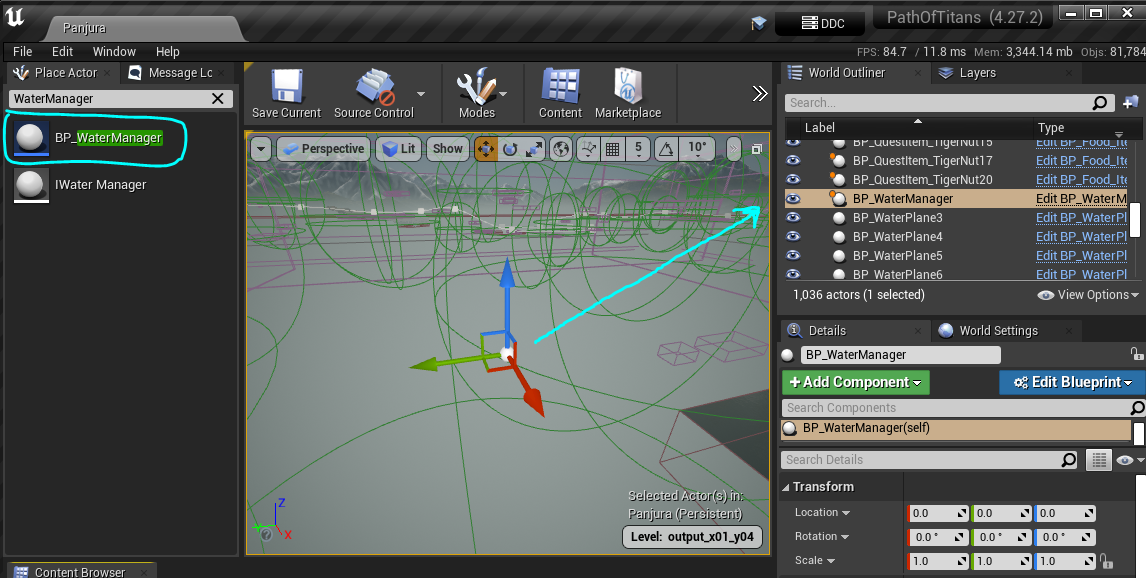
You need to place a Water Manager blueprint into your level, which will manage the quality of all the bodies of water on your map. Without this, many water system will not work.
- Ensure your have your persistent level selected.
- Search for "WaterManager" in the Place Actors list. Alternatively you can go to
Content\Blueprints\Waterand use BP_WaterManager. - Place the Water Manager into your persistent level.
- Modify any of the settings you desire on the water manager. We highly suggest
Enable Water Quality Systemto be checked ON.
Summary
In this tutorial you completed the following:
- Placed down Water Planes.
- Use the
EUW_WaterBuoyancyGeneratorTool to automatically place swimmable physics volumes. - Added Tags to your water bodies.
- Added a Water Manager to your persistent level.