Picking Up Items and Jaw Setup
Step 1: Create Animations
The pickup system uses an Aim Offset animation to determine how wide to open the jaw. We must set this up by making a 1 frame animation for the closed mouth pose and the open mouth pose.
See below for the list of animations required.
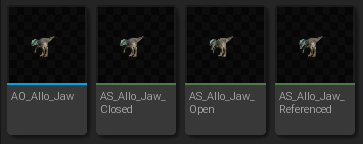
| Animation Name | Description | Additive Anim Type | Example Image |
|---|---|---|---|
AO_Dino_Jaw | The Aim Offset animation used to dictate how wide the jaw should open. (see below for more info) | ||
AS_Dino_JawClosed | 1 frame animation with the jaw closed. No other bone rotations. | Mesh Space, Selected Animation Scaled (using AS_Dino_JawReferenced as the Base Pose Animation) | 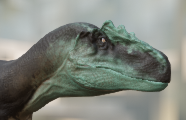 |
AS_Dino_JawOpen | 1 frame animation with the jaw open as wide as possible (can include both the jaw and tongue rotated). No other bone rotations. | Mesh Space, Selected Animation Scaled (using AS_Dino_JawReferenced as the Base Pose Animation) | 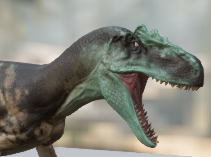 |
AS_Dino_JawReferenced | 1 frame animation in a t-pose without any bone rotations. | No Additive | 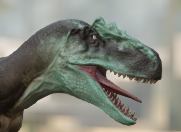 |
Setting up AO_Dino_Jaw
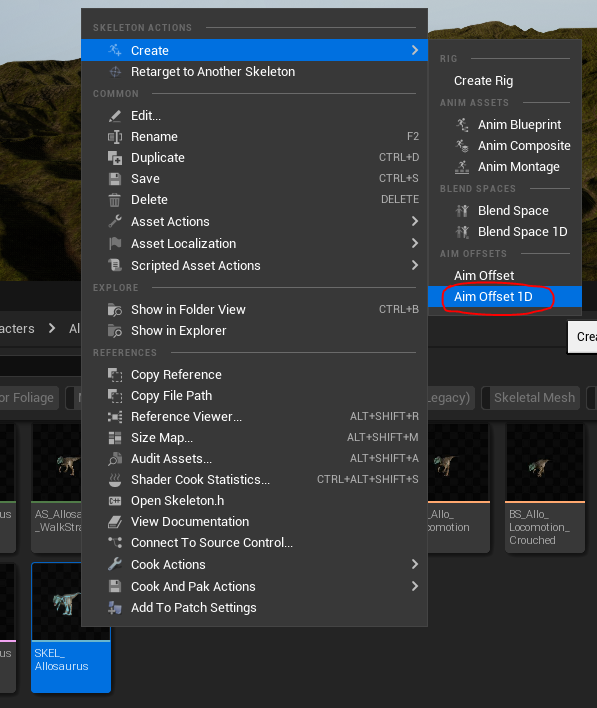
- Create the Aim Offset (AO) by right-clicking your creature's skeleton and creating an
Aim Offset 1Das shown below.
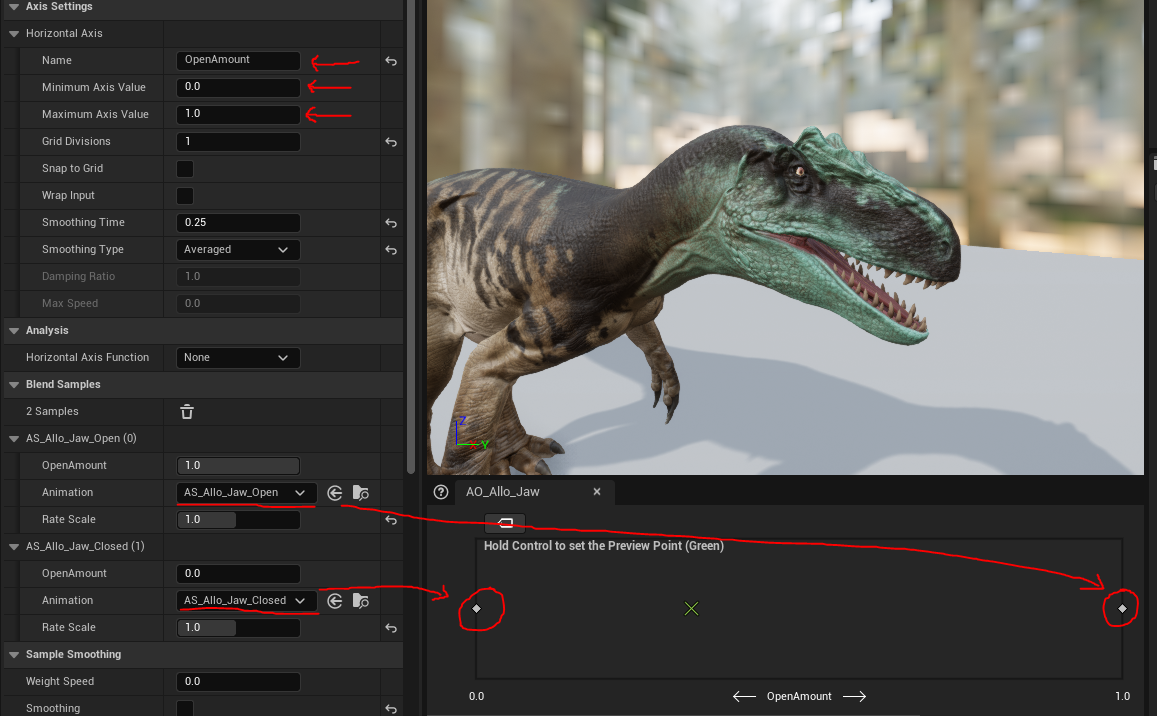
- Edit the Aim Offset and apply the following settings:
- Name the Horizontal Axis
OpenAmount - Minimum Axis Value =
0 - Maximum Axis Value =
1 - Drag and drop the
AS_Dino_JawClosedanimation onto the grid, placed furthest to the left (at 0) - Drag and drop the
AS_Dino_JawOpenanimation onto the grid, placed furthest to the right (at 1)
You can use the base game dinosaur Aim Offsets for reference if you need help.
Step 2: Assign To Animation Blueprint
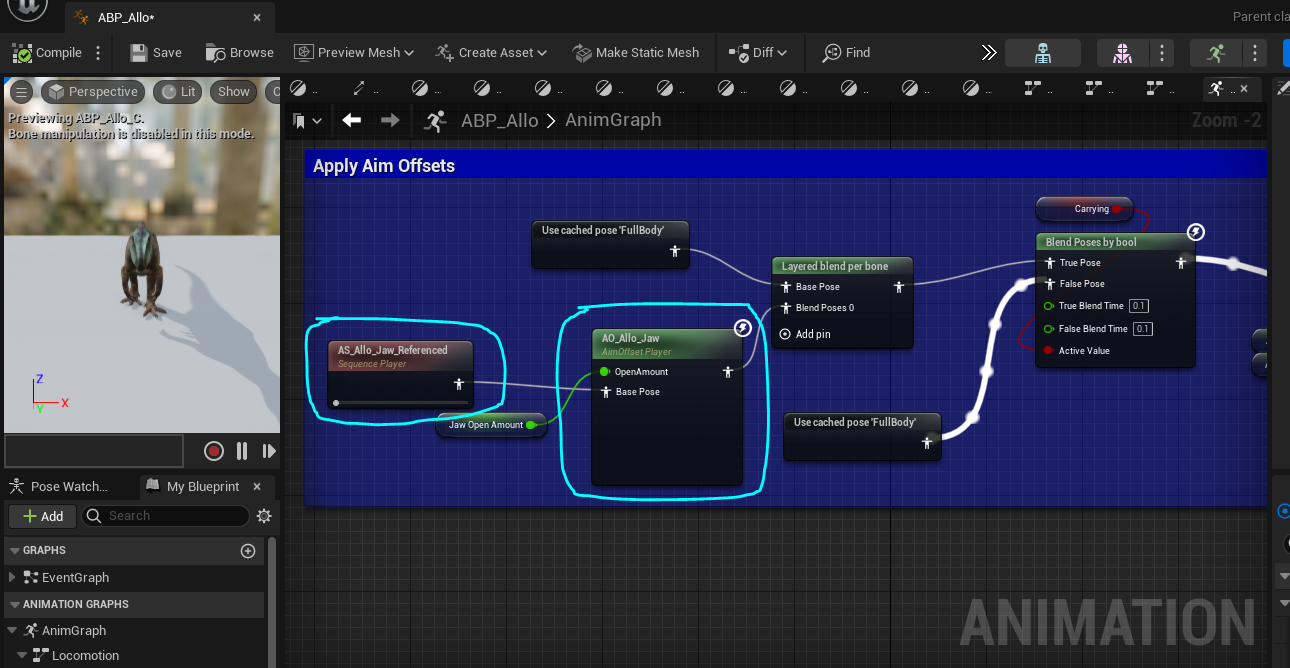
- Open your creature's animation blueprint.
- Replace the old
AO_Name_Jawfound in the AnimGraph with your newly createdAO_Dino_JawAim Offset. - Ensure you also slot in your newly created
AS_Dino_JawReferencedjust to the left of it, and plug it in. - Compile and Save the Animation Blueprint.
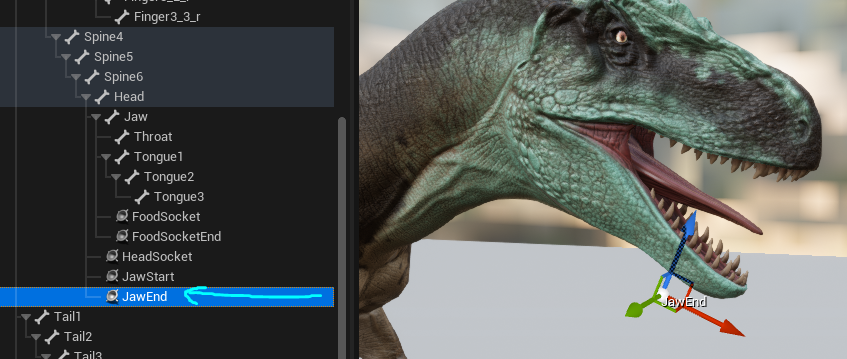
Step 3: Add JawStart and JawEnd Sockets to Skeleton
- Open your creature's skeleton.
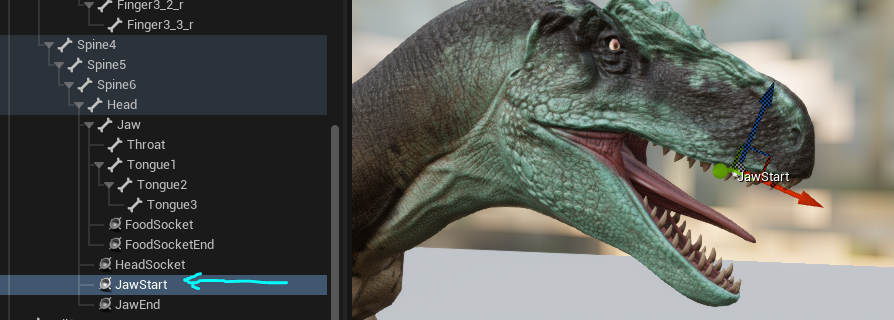
- Right click on your creature's head bone and select "Add Socket"
- Rename your socket to
JawStart - Use the move and rotate tools to move the socket so it is placed at the top-front of your creature's mouth.
- Next, right click on your creature's head bone and select "Add Socket" to add another socket.
- Rename your new socket to
JawEnd - Use the move and rotate tools to move the socket so it is placed at the location where your creature's mouth will be opened widest.
TIP
This may mean the socket is technically below your creature's jaw- remember this socket should correspond to where the jaw is when it's opened fully.
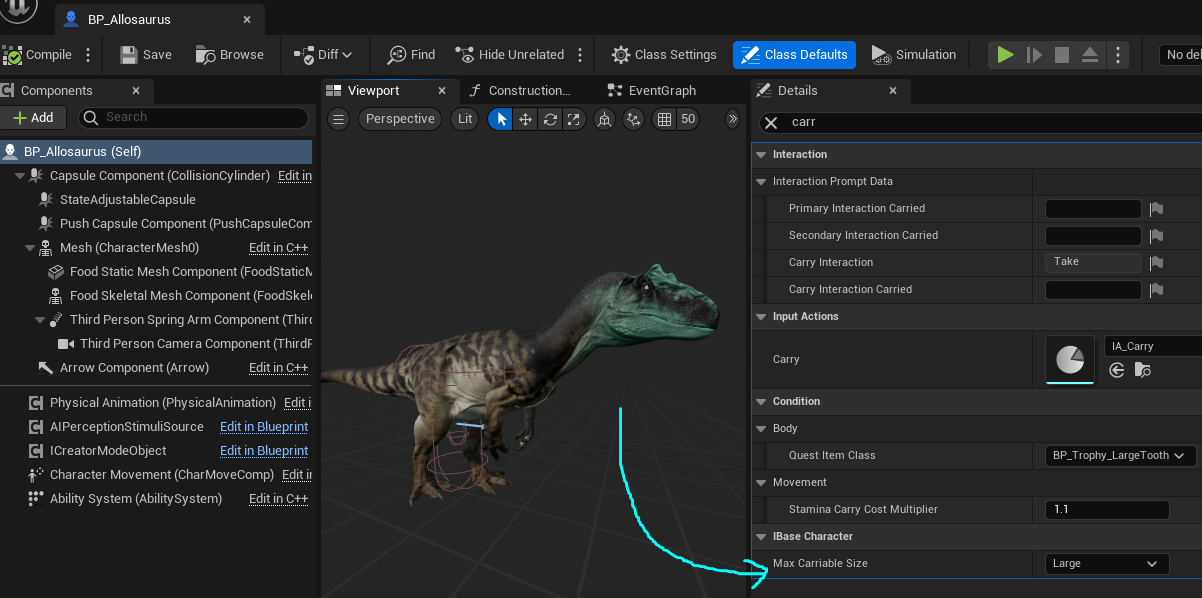
Step 4: Change Carriable Item Size
- Open your creature's blueprint and search for "Max Carriable Size"
- Here you can dictate what the maximum item size your creature can carry. This relates more to the largest meat chunk/critter/fish they can carry. Standard items such as melons, flowers, and nuts will automatically scale down to fit your creature's mouth.
Step 5: Create Pickup Animation
- Import your creature's item pickup animation into your animation folder.
- Right click on it and select "Create Animation Montage".
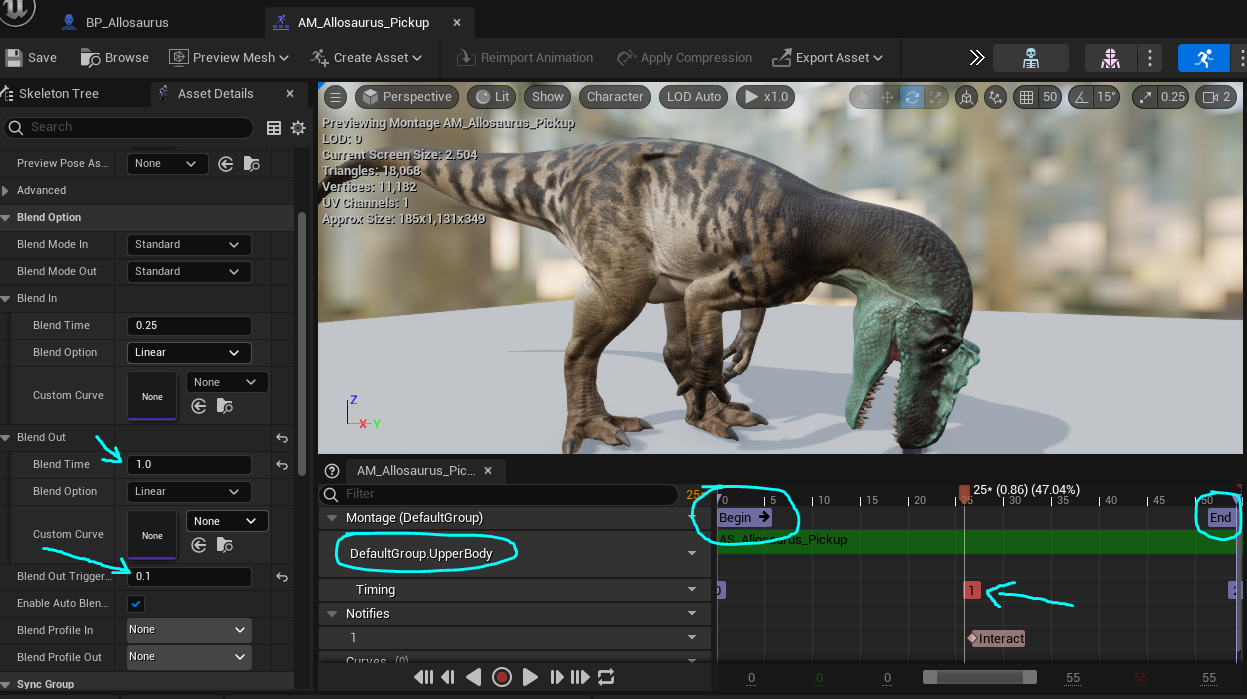
- Ensure the animation montage uses the
DefaultGroup.UpperBodyMontage type. - Right click on the timeline and add a "New Montage Section" called
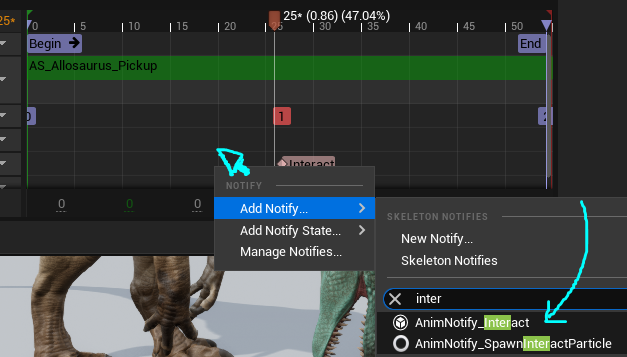
BeginandEndplaced at the start and end of your montage. - In the middle of your animation montage, where your creature's head is closest to the ground, right click and select
Add Notify > AnimNotify_Interactto create a notify that will tell the game to pick up the item on this frame. - Adjust your Blend Out time to be
1.0 - Change the Blend Out Trigger Time to be
0.1
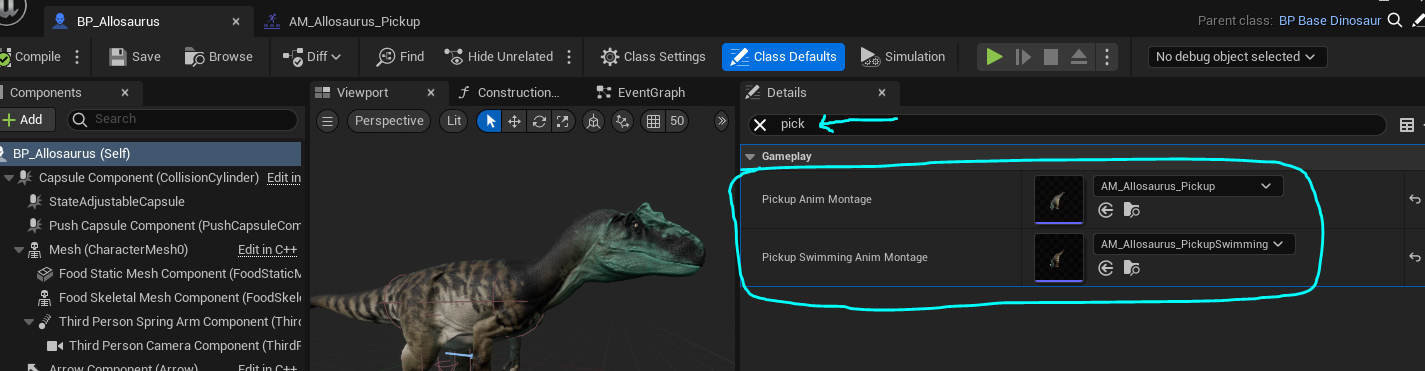
Step 6: Add Pickup Animation
- Once the Montage is set up, open your character's blueprint and add it to both the swimming and regular Pickup slots.
- Compile and save your blueprint.
Summary
If you followed this tutorial, you have done the following:
- Setup Jaw AimOffsets
- Setup Jaw Sockets on your creature's skeleton
- Created and imported pickup animations and slotted them into your blueprint.