Adding a Minimap
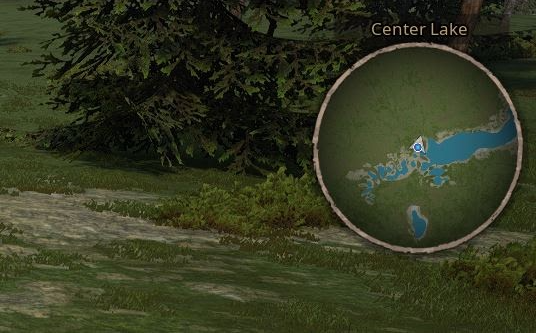
Path of Titans supports minimaps, which displays in the top right of your screen when playing. This tutorial will show you how to take an accurate, high rez image of your map that you can turn into a minimap image. It will also show you how to set up the Minimap blueprint on your map and how to slot in your newly created Minimap image.
Step 1: Taking a Top-Down Screenshot of your Map
In order to use the minimap feature of Path of Titans, your map will require a 4096x4096 top down view of your map.
- Load your map up, and also load all tiles of your map too if it uses world composition (
Windows > World Composition > Select all levels > Right click > Load levels) - Once all levels are loaded, change the view perspective to “Top” via the top left dropdown menu on the viewport.
Now, we must prepare the map in order to take a high-resolution screenshot to use as the minimap.
- First, hide all elements of the map that you do not want to display on the minimap. For instance, you should hide foliage, trees, volumes, blueprints, and fog. You can hide these by making these items invisible on your world outliner on your map.

- It is highly recommended to temporarily assign a flat blue material to all your water bodies and rivers. This way, players will be able to easily and clearly show where water is located on your map. You can do this by creating a new material with a colour parameter plugged into the base colour material node and select the colour you want your water to be.
Once you have your view of the map looking how you’d like, we will take a high-resolution screenshot of the map preview.
- On the drop down menu at the top left of the viewport, select “High Resolution Screenshot”
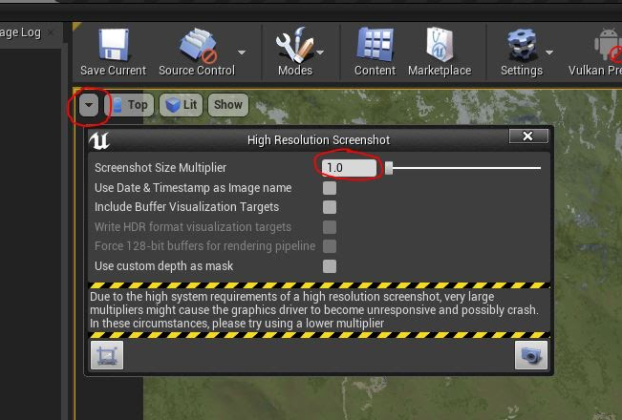
A window will open containing all the settings for taking a high rez screenshot. Increase the Screenshot Size Multiplier parameter to 4.0 or larger, and maximize the viewport with F11. Center your map on your screen and click the “Take a screenshot” button on the screenshot window.
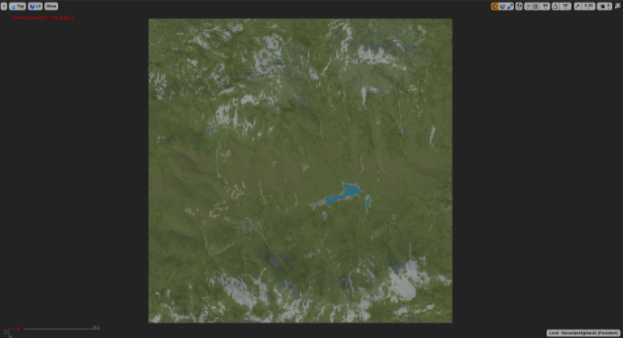
Your computer will pause for a second while it takes a screenshot, and then will save the screenshot to your screenshot folder. Click the pop-up message that appears in order to open it in windows explorer.
You will notice that your high-rez screenshot may not be centered, or have a lot of extra space around it. You will need to adjust your zoom level or possibly take multiple screenshots and stitch them together in some image editing software.
In this example, I have taken a screenshot of Stoneclaw Highlands, a mod map.
Step 2: Editing your Minimap
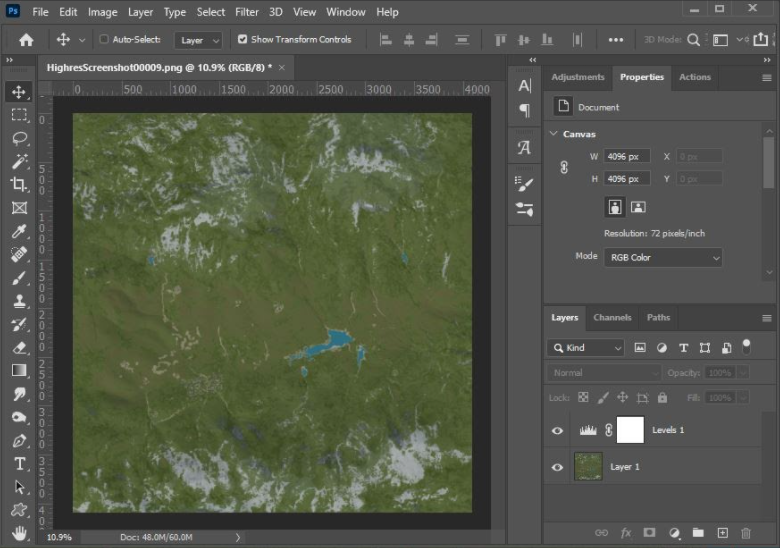
- Once you have your screenshots taken, open the image in the image editing software of your choice, such as GIMP or Photoshop.
- Crop your image so that the exact edges of the map are flush with the edge of the image, leaving you with a perfectly square map.
You can leave your map like this if you prefer, however this is the step where you are free to edit the map as you see fit. It might be useful to edit the colour balancing, adjust brightness, or add extra flourishes to your map. Do remember that the minimap will be the best way for players to navigate your map, so try to keep it looking as accurate as possible.
In this screenshot I have cropped the minimap to the exact edges, and have applied a small adjustment to improve the contrast of the map.
- Once you have made your edits, you must resize your map to be
4096x4096pixels large.
Ideally, this means your image should be shrunk down to fit this resolution. If this causes your map to be scaled up and look blurry, you should retake your screenshots to be a larger resolution.
- Save your
4096x4096minimap image as a PNG - Now that the minimap screenshot has been captured, you can reset your map back to its intended state either by closing it without saving and reopening it, or reassigning the water materials back and making the map assets visible again.
Step 3: Setting Up the Minimap Blueprint
- Import the minimap texture into your mod folder, preferably into a folder designated to Textures.
- Open the minimap texture and assign the following settings:
- Compression Settings:
UserInterface2D(RGBA) - Texture Group:
UI
- Place a “Map Background” blueprint into your persistent level.
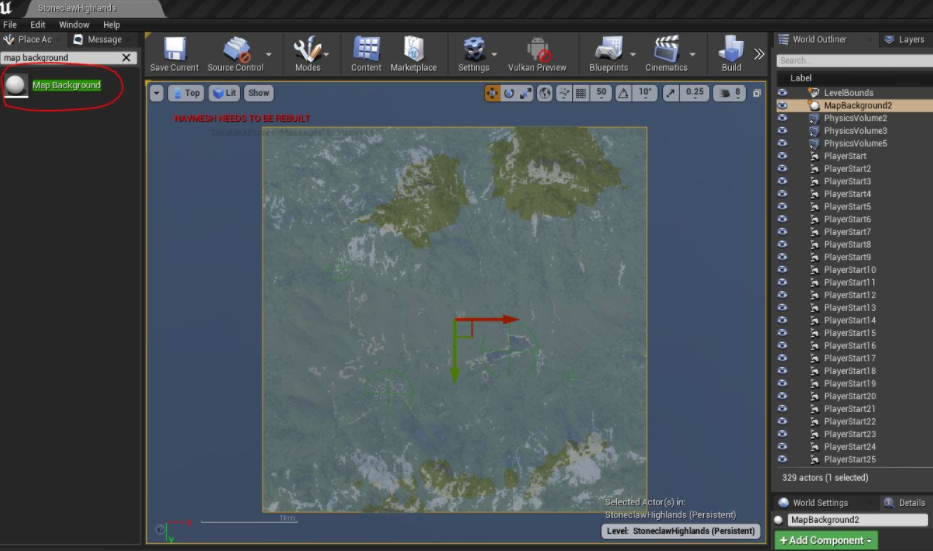
- Position the Map Background blueprint at (0,0,0) and ensure there is no scaling or rotation applied to it.
- Select the MapBackground blueprint in your level and assign your Minimap Texture into the Background Texture slot.
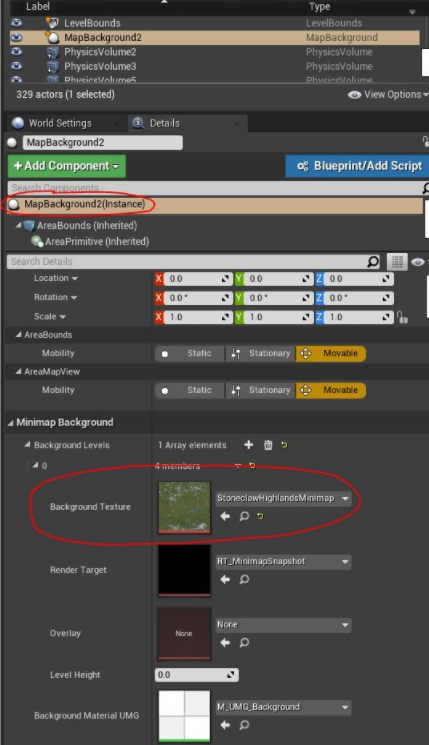
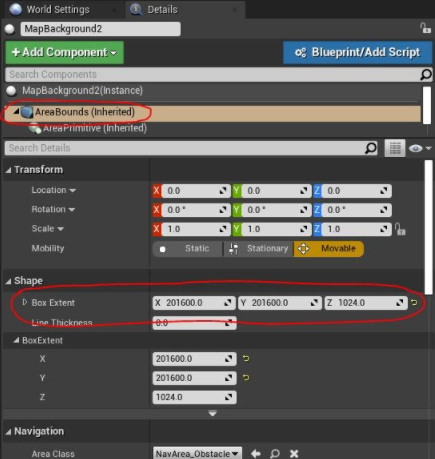
- Select the AreaBounds component and adjust the Box Extent component so that it perfectly fits the edge of your map. In this image you can see the MapBackground extents align to the edge of the map.
You have now completed the minimap for your map. Ensure that everything is working by testing your map and ensuring that the objects on your map are reflected accurately in your minimap.
Summary
By following this tutorial you will have completed the following:
- Created a
4096x4096minimap image - Setup the Minimap blueprint on your level and assigned the minimap image