Create Physics Assets
The physics asset is extremely important to your character. The physics asset is responsible for:
- Attack and Damage hitboxes
- The dead body ragdoll when your creature is killed
- Any physics applied to your creature, like a tail or wattle.
Without a physics asset, your dinosaur will disappear when killed, and won't deal or take any damage.
Step 1: Generate a Physics Asset
When you imported your mesh, it's possible this asset was already generated. You would be able to find it in the same folder as your skeleton, with the suffix _Phys If it was generated, you can skip this step.
- Right click on your creature's mesh.
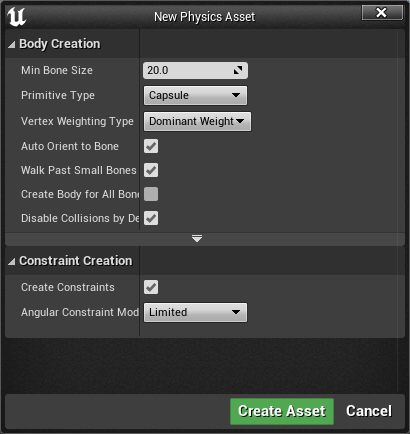
- Select
Create > Physics Asset > Create and Assign - Leave everything as the default settings and click "Create Asset"
- This will create a physics asset next to your mesh with the suffix
_Phys
Step 2: Edit the Physics Asset
The automatically generated physics asset that Unreal Engine creates is often decent, but with a few tweaks you can get it much more accurate to improve hit detection and performance.
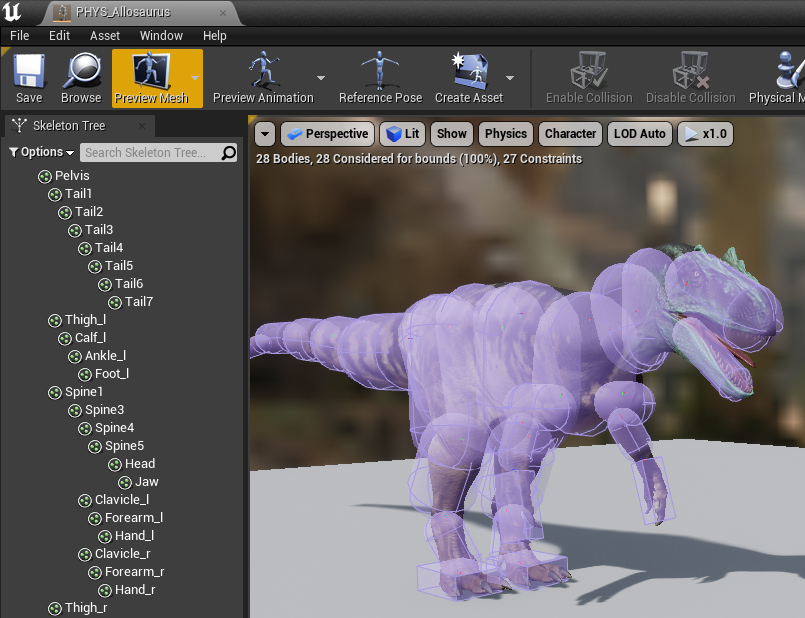
- Double click to open and edit this asset.
- On the left-hand panel, mass select all your constraints by right clicking on a constraint and selecting “Select all constraints”
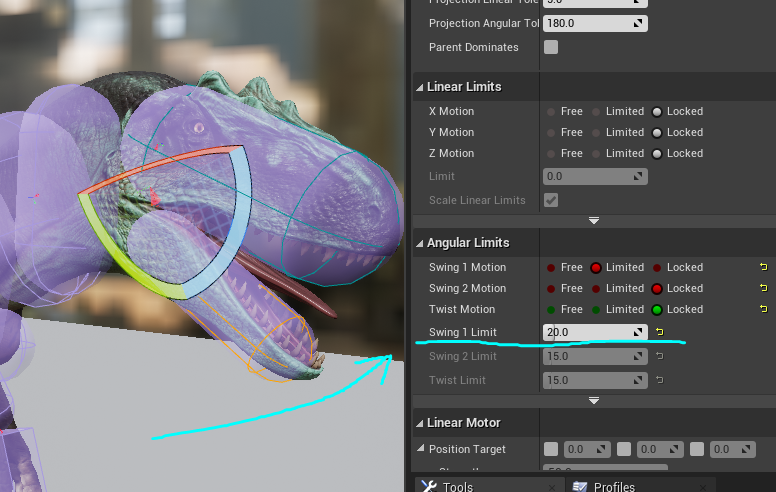
- On the right hand side, scroll down to the "Angular Limits" section and set
Swing 1 Motion,Swing 2 Motion, andTwist Motionto15 - Additionally, you should delete any extra capsules that do not need to have physics applied to them. For example, it’s not important to simulate physics on every individual finger and toe bone. Deleting these will help improve performance. You can test your physics asset by clicking on the “Simulate” button. Ensure that it falls correctly and looks realistic.
- Click the drop-down underneath the Simulate button and select “No-Gravity Simulation”
- Now click simulate, stop the simulation, and simulate again (there’s a bug in Unreal that makes the first non-gravity simulation act incorrectly). If you see ANY movement in this second simulation or any future simulations this means there is an issue with your physics capsules overlapping. Ensure that none are overlapping to fix this issue.
TIP
Rotation Constraints
Certain bones don't make sense twisting back and forth, such as the Jaw. You can edit your physics asset to restrict the rotation of these bones.
- Select the constraint for the bone you want to edit.
- On the Details panel on the right, scroll down to "Angular Limits"
- You can lock some of these motions depending on what direction you want the bone to swing. For example, you can have the jaw only swing open and closed, and not side-to-side.
Summary
If you follow all the above steps, you should have the following:
- a highly accurate Physics Asset that is assigned to your mesh.
Congrats! You can now move on to the next step. Back to tutorial.