Optimizing Map Tile Boundaries
INFO
If you do not use landscape tiles/sublevels and your whole map is on 1 level, you can ignore this step.
What are Map Boundaries?
Boundaries contain all of the assets and landscape of your tile. If you are looking to optimize your map for low end PCs and mobile/Nintendo Switch, you must ensure your map boundaries are perfectly optimized and not overlapping other tiles.
For devices that have a small amount of memory, it is important to only load the exact number of tiles the player needs to play the game. Unreal Engine will load the 4 nearest tiles around the player based on how close the player is to the tile boundary. If the tile has incorrect boundaries, the game will try to load more than 4 tiles and can often cause crashes.
To fix this, you must always ensure your level boundaries are as tight as possible to the extents of your landscape.
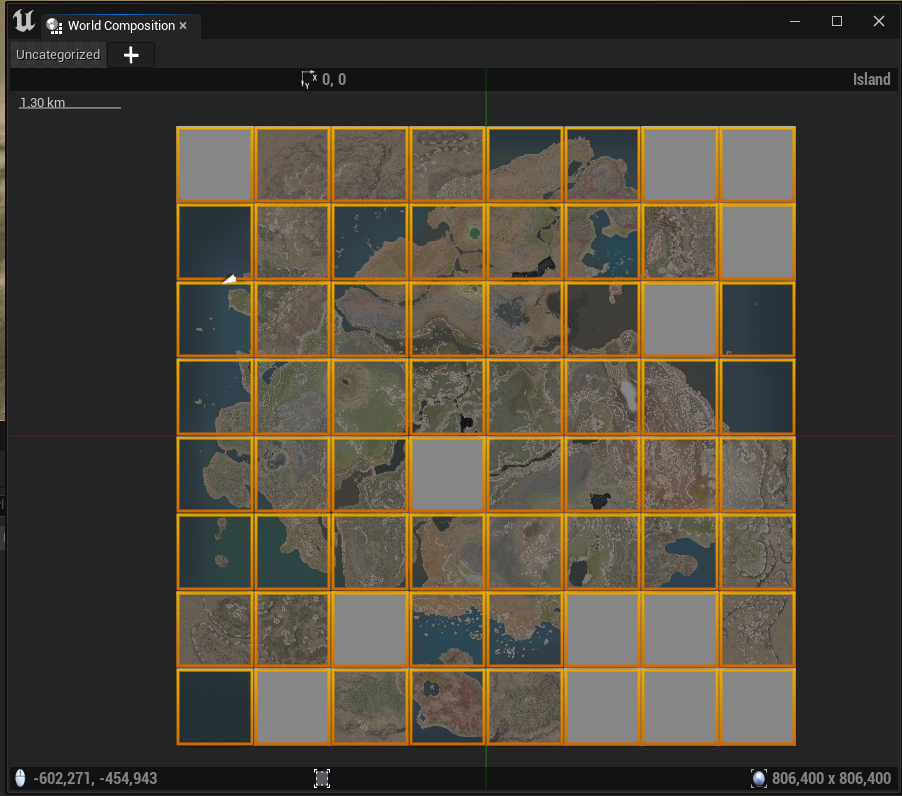
Below is an example of a map with perfect map boundaries (in orange). Notice they are all square and do not overlap.
Step 1: Find and Move Assets to Correct Sublevels
- First, you will want to fix any floating assets. Load up each tile on your map one-by-one and look around for any assets that are floating off the edge of your landscape.
- If you find any, you should cut (Ctrl + X) and paste (Ctrl + V) the assets into their correct levels.
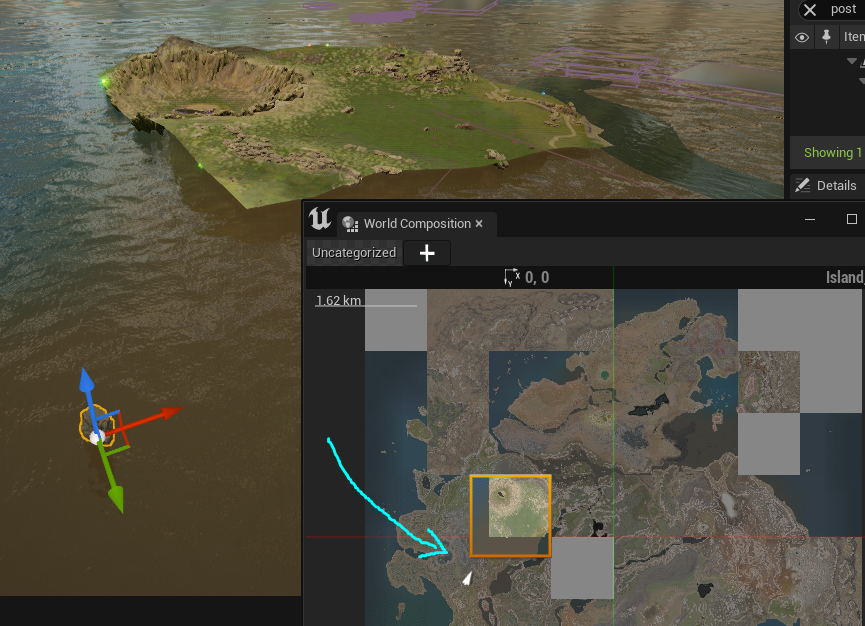
The picture below shows how a rock is part of a grassland tile, but not actually placed in the tile boundaries and is floating. This means the bounds of the tile (in orange) are extending too far off the edge of the landscape. This rock needs to be moved into the correct level.
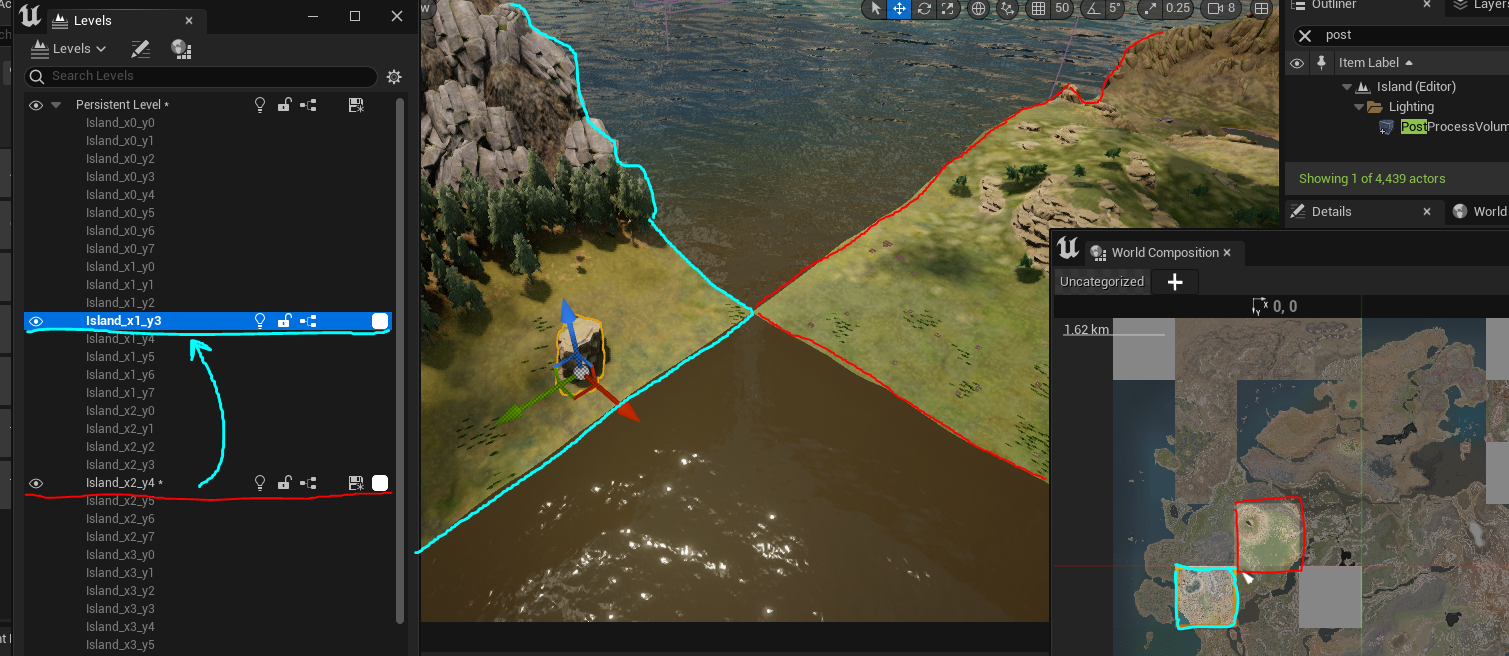
In the second picture below I have cut + pasted the rock from the red tile into the cyan tile to put it into the correct boundaries.
You must go through every sublevel/tile on your map and move all assets to their correct levels. This will fix the majority of the problems, however there is another step we can take to make the map boundaries perfect.
Step 2: Disable Auto-Update Bounds
- Load up a tile on your map.
- Select the LevelBounds for that tile.
- Check OFF
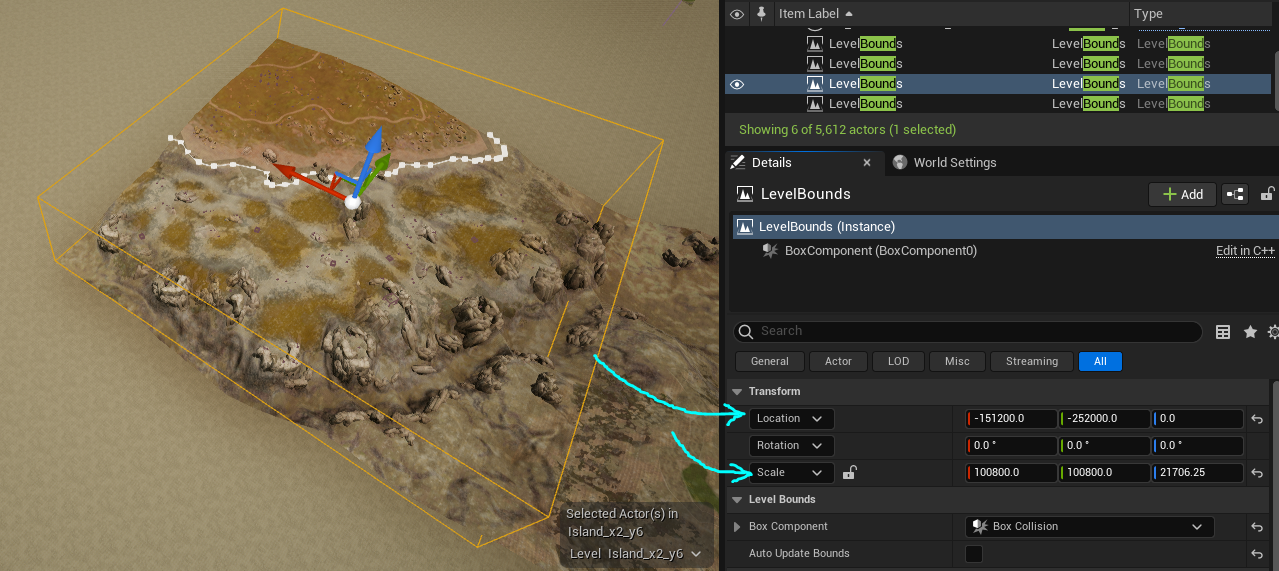
Auto Update Bounds. This will disable your map bounds from updating and keep them locked at your desired scale. This means we can make the boundaries mathematically perfect. - Perform the math below to recalculate the LevelBounds Location and Scale.
We likely need to re-center your LevelBounds as they aren't perfectly scaled and positioned any more. This step can get a little technical, but essentially you can calculate the exact center of your tiles by finding the tile's landscape Location and adding half its diameter. For example:
Tile Location is: (X=-201600.000000,Y=-302400.000000,Z=0.000000)
Tile Width is: 100800 units
Divide Width by 2 = 50400 units
Add 50400 to the X and Y of the tile location = (X=-151200.000000,Y=-252000.000000,Z=0.000000)
Therefore, (X=-151200.000000,Y=-252000.000000,Z=0.000000) is the Location your level bounds for that tile should be.
You can then change the Scale of your LevelBounds to simply be the Width of the tile and you will now have a perfectly centered and scaled bounds!
Repeat this for all other tiles on your level, and you will now have perfectly accurate boundaries!
Summary
By following this tutorial you will have completed the following:
- Moved all assets onto their correct tile/sublevels
- Adjusted the Level Bounds for every tile to be perfectly aligned.